Apr 9, 2009
Blinking LED on Arduino NG with AVR MacPack first time
As Arduino has Atmel chip on board, you can also program code with C on your Mac. Softwares for the developing environment are all free. Programming with C looks more complicated but still all logic are the same as Arduion IDE and you can even create more functions with C. Once you have managesd to run your C language code on Arduio, you can also flash the code to other smaller or more powerful Atmel chips. This post describes how I as Mac user managed to write a code to blink LED on Arduion board.

Developing environment
- AVR MacPack is needed to install a compiler for AVR chips.
- XCode should also be installed to write C language code.
- Terminal is used to compile the C code and flash the code. This is installed on your Mac by default.
- Number converter widget on OSX dashboard might be useful.
Creating project files
Terminal
bash$ cd ~/Documents
bash$ mkdir AVR
bash$ cd AVR
bash$ avr-project Demo
bash$ cd Demo
bash$ ls
demo3.xcodeproj firmware
bash$ cd firmware
bash$ ls
Makefile main.c
bash$ avr-gcc-select 4 //AVR MacPack comes with gcc version 3 and 4. Make GCC 4 as default
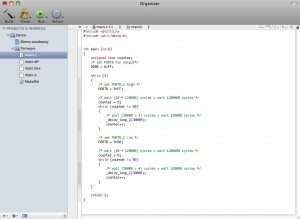
Open Xcode. In Organizer view, you can select “Add existing folder” and import the Demo folder.
Writing code
Open main.c from the imported folder.
main.c
#include <avr/io.h>
#include <util/delay.h>
int main(void){
DDRB = (1<<PB5); // make Arduino Pin 13 (Atmega8 PortB bit 5) an output (%0000100)
for(;;){
char i;
for(i = 0; i < 10; i++){
_delay_ms(30); // max is 262.14 ms / F_CPU in MHz
}
PORTB ^= (1<<PB5); // put Arduino Pin 13 (Atmega8 PortB bit 5) HIGH (%00100000)
for(i = 0; i < 10; i++){
_delay_ms(30);
}
PORTB ^= (1<<PB5); // put Arduino Pin 13 (Atmega8 PortB bit 5) LOW (%00000000)
}
return 0;
}
Compile and flash code
Now you can run the build process in the firmware directory
Terminal
bash$ make
If there is no error, you can uploading code to Arduino NG (Atmega8). Don’t forget to press reset button on Arduino board.
Terminal
avrdude -p m8 -P /dev/tty.usbserial-A1000eYN -c stk500v1 -b 19200 -F -u -U flash:w:main.hex
More information about avrdude command can be downloaded here (pdf).
command line options
-p partno
This is the only mandatory option and it tells AVRDUDE what type of part (MCU) that is connected to the programmer. (m8 -> ATmega8)
-P port
Use port to identify the device to which the programmer is attached.
-c programmer-id
Specify the programmer to be used. AVRDUDE knows about several common programmers. Use this option to specify which one to use. (Arduino NG uses stk500v1)
-b baudrate
Override the RS-232 connection baud rate specified in the respective programmer’s entry of the configuration file.
-F
Normally, AVRDUDE tries to verify that the device signature read from the part is reasonable before continuing.
-u
Disables the default behaviour of reading out the fuses three times before programming, then verifying at the end of programming that the fuses have not changed.
-U memtype:op:filename[:format]
Perform a memory operation, equivalent to specifing the ‘-m’, ‘-i’ or ‘-o’, and ‘-f’ options, except that multiple ‘-U’ optins can be specified in order to operate on mulitple memories on the same command-line invocation.
flash The flash ROM of the device.
w read the specified file and write it to the specified device memory
LED on Pin 13 should start blinking.
Reference:
Program Arduino with AVR-GCC
http://javiervalcarce.es/wiki/Program_Arduino_with_AVR-GCC
AVR MacPack Getting started
http://www.obdev.at/products/avrmacpack/index-de.html
AVR MacPack Manual (local)
file:///usr/local/AVRMacPack-20090319/manual/index.html
