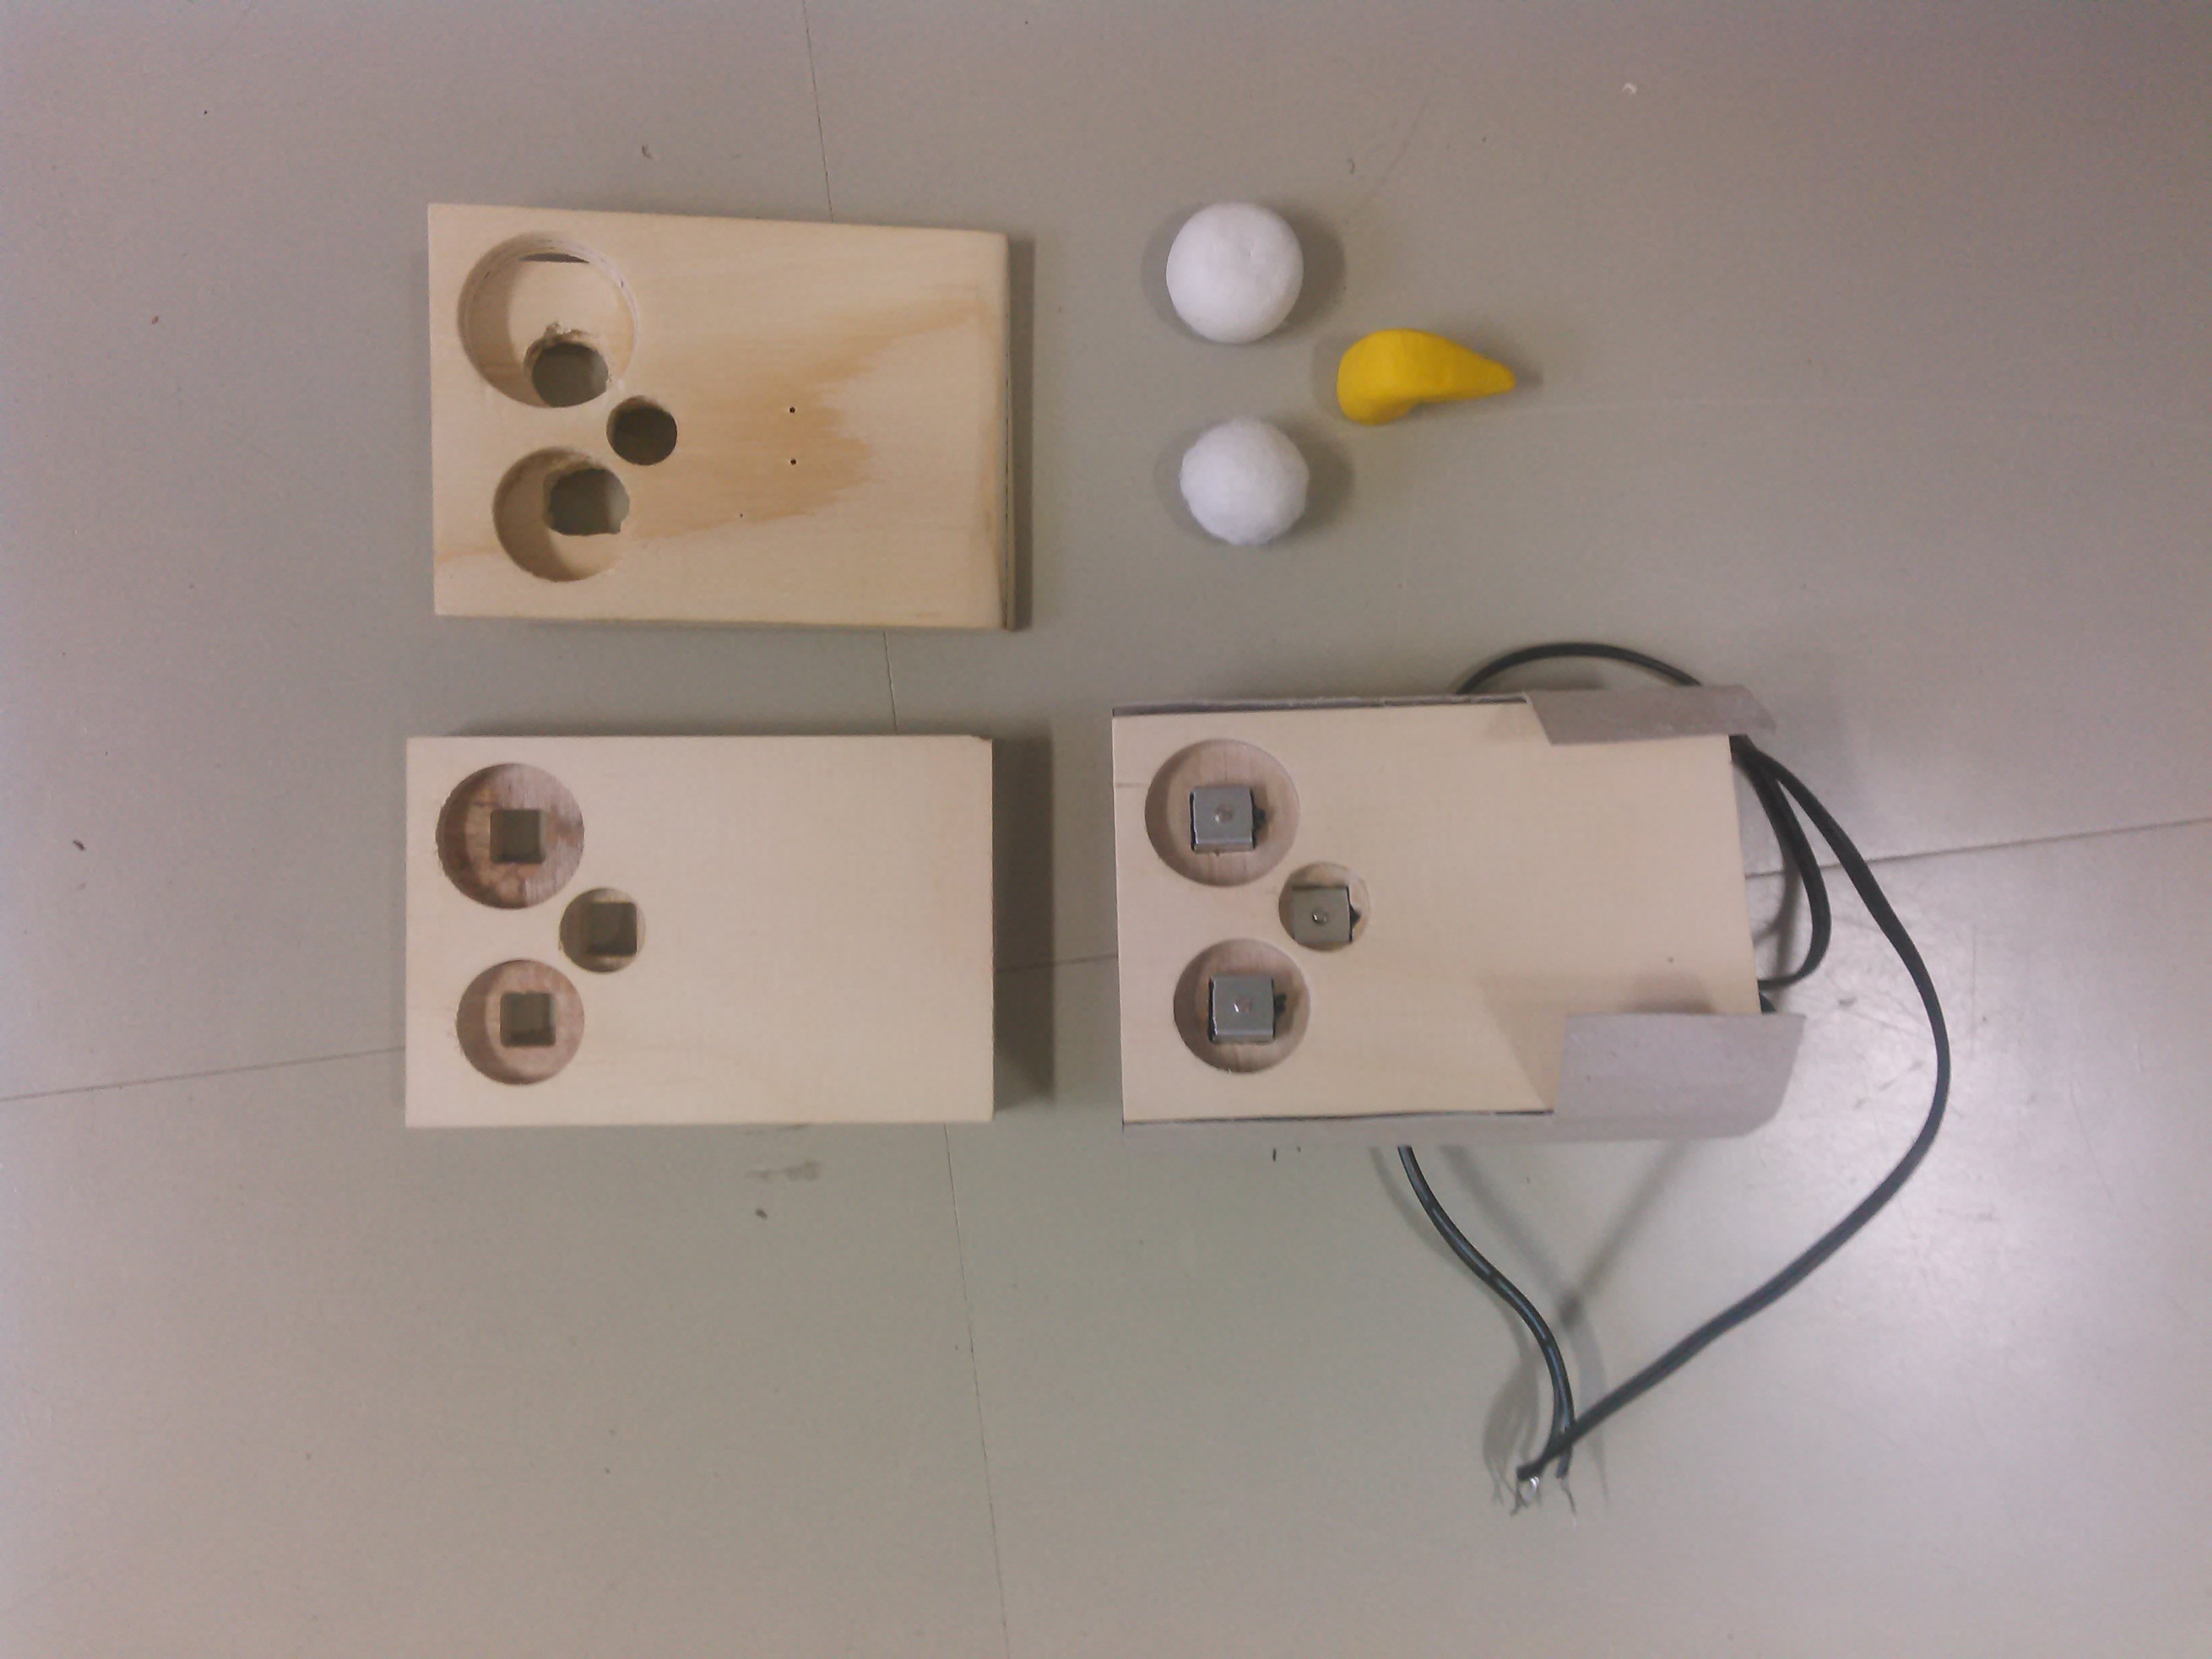
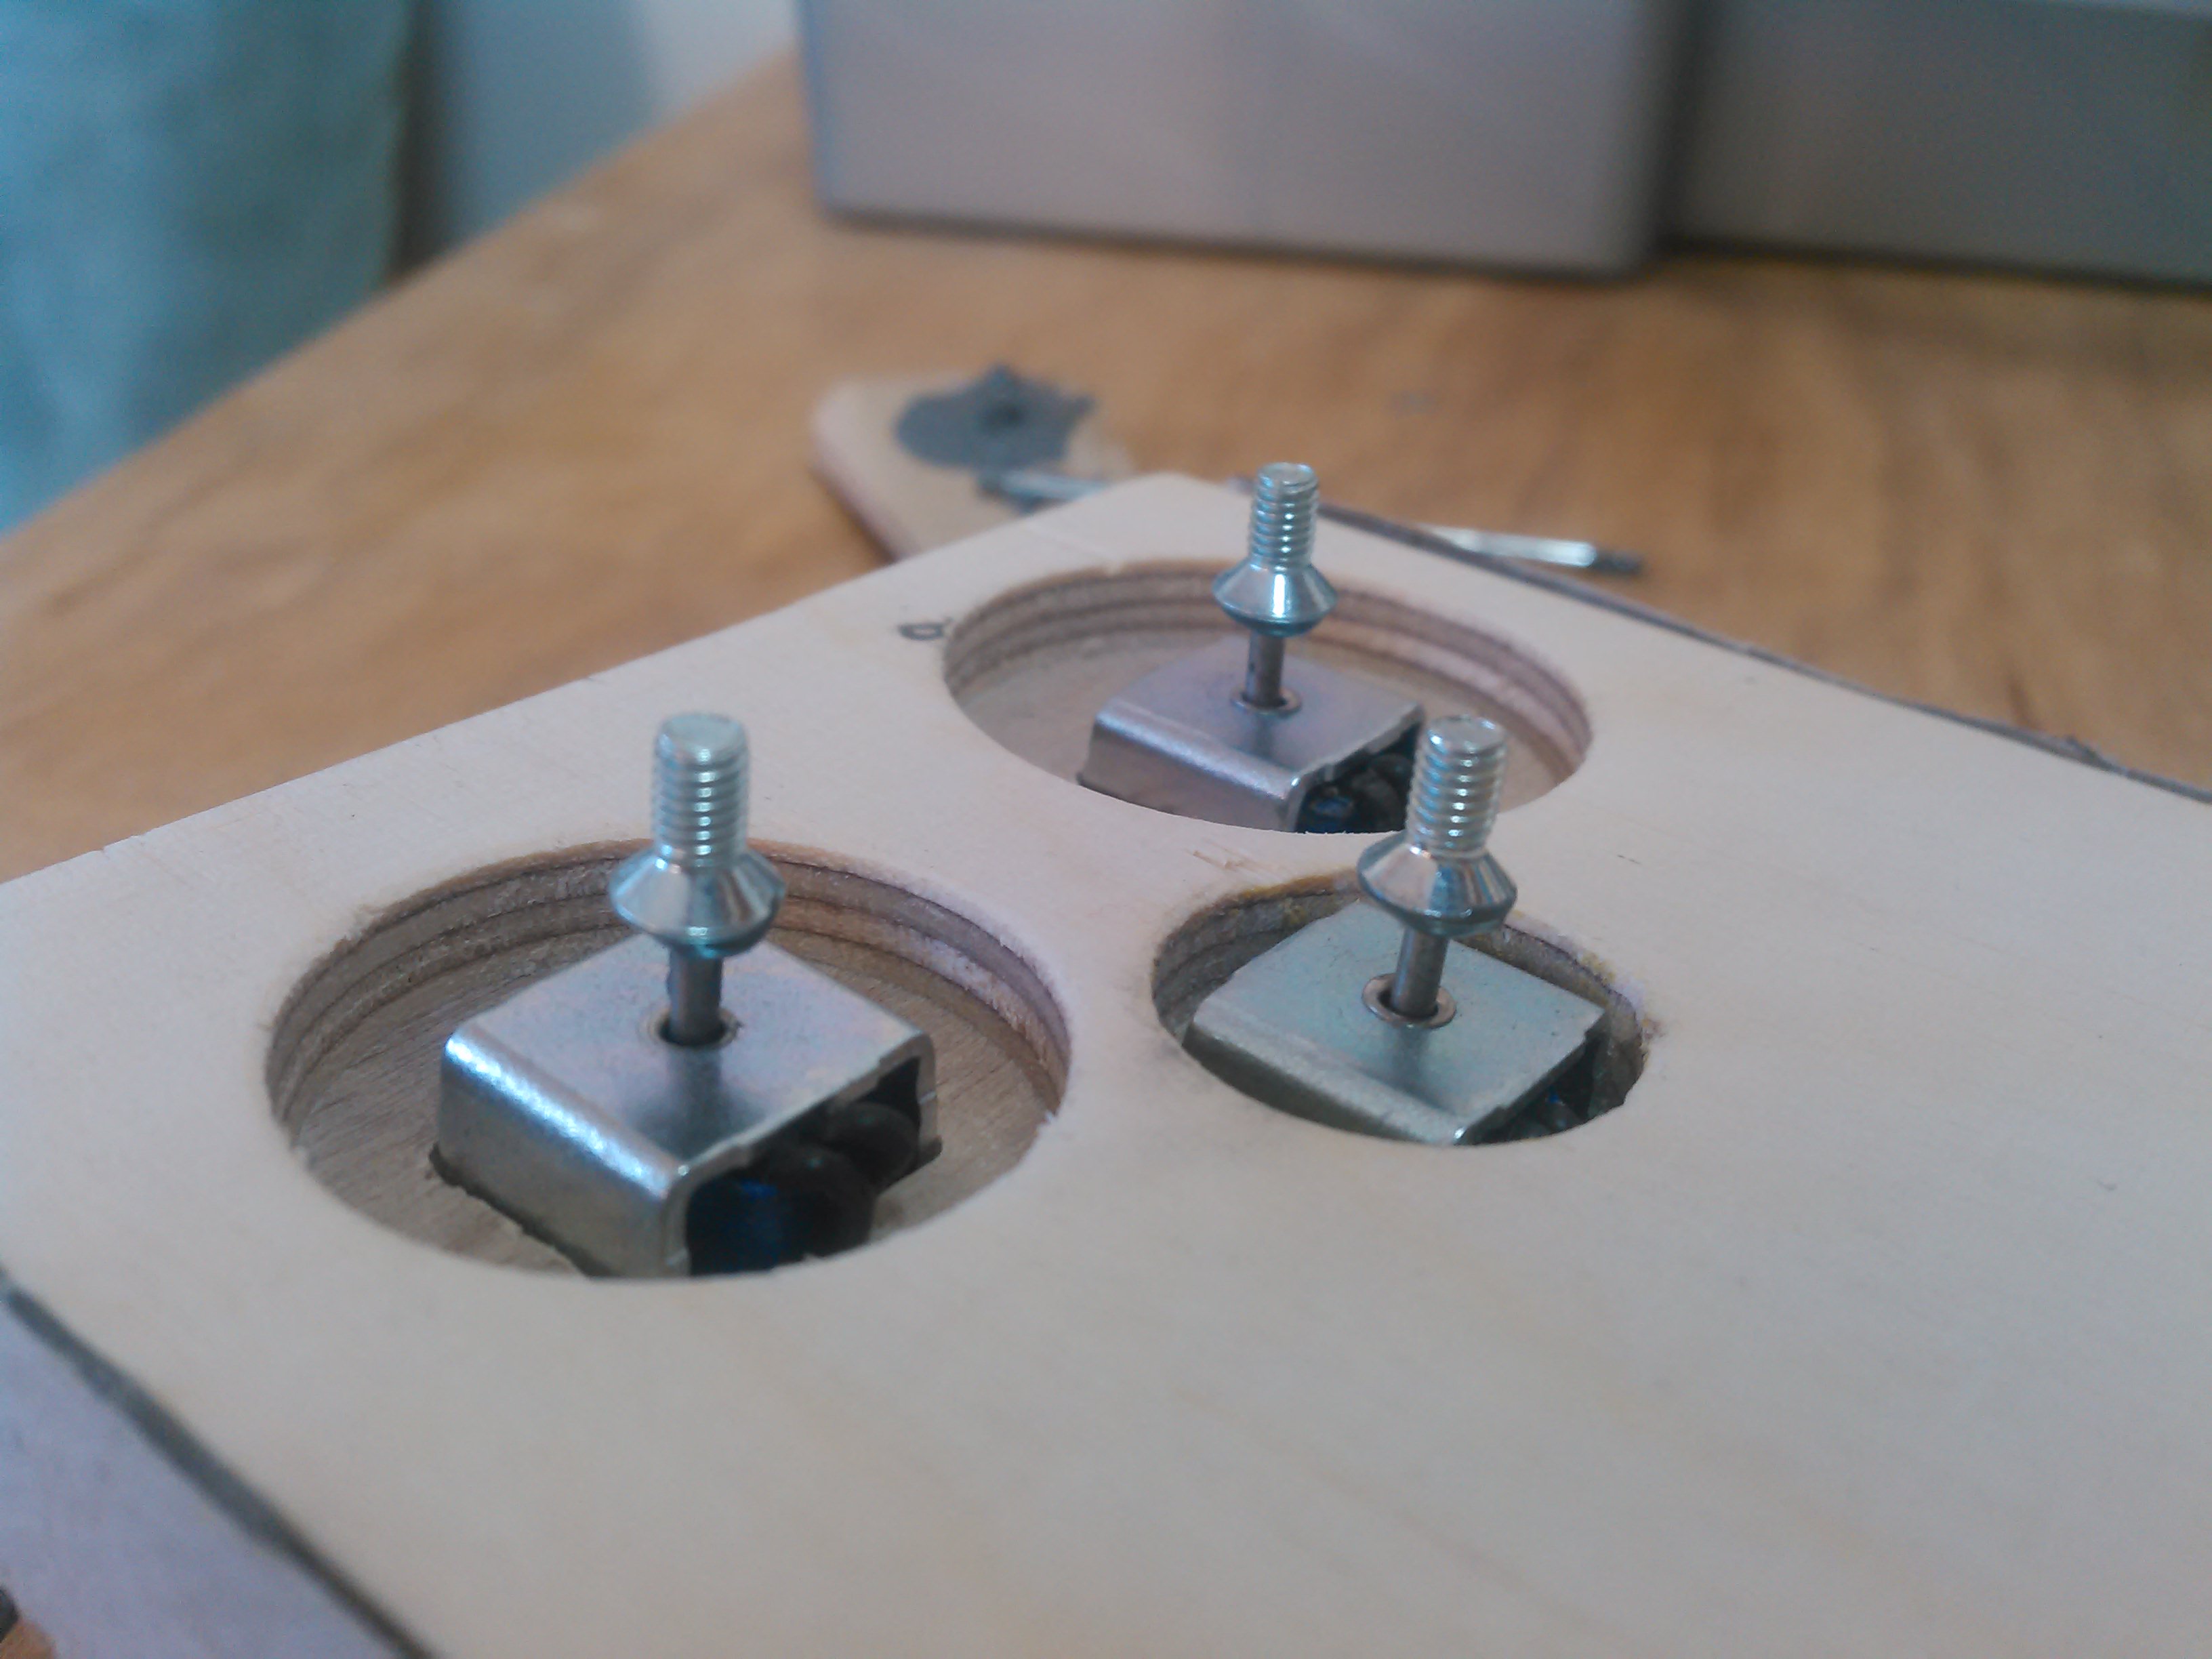
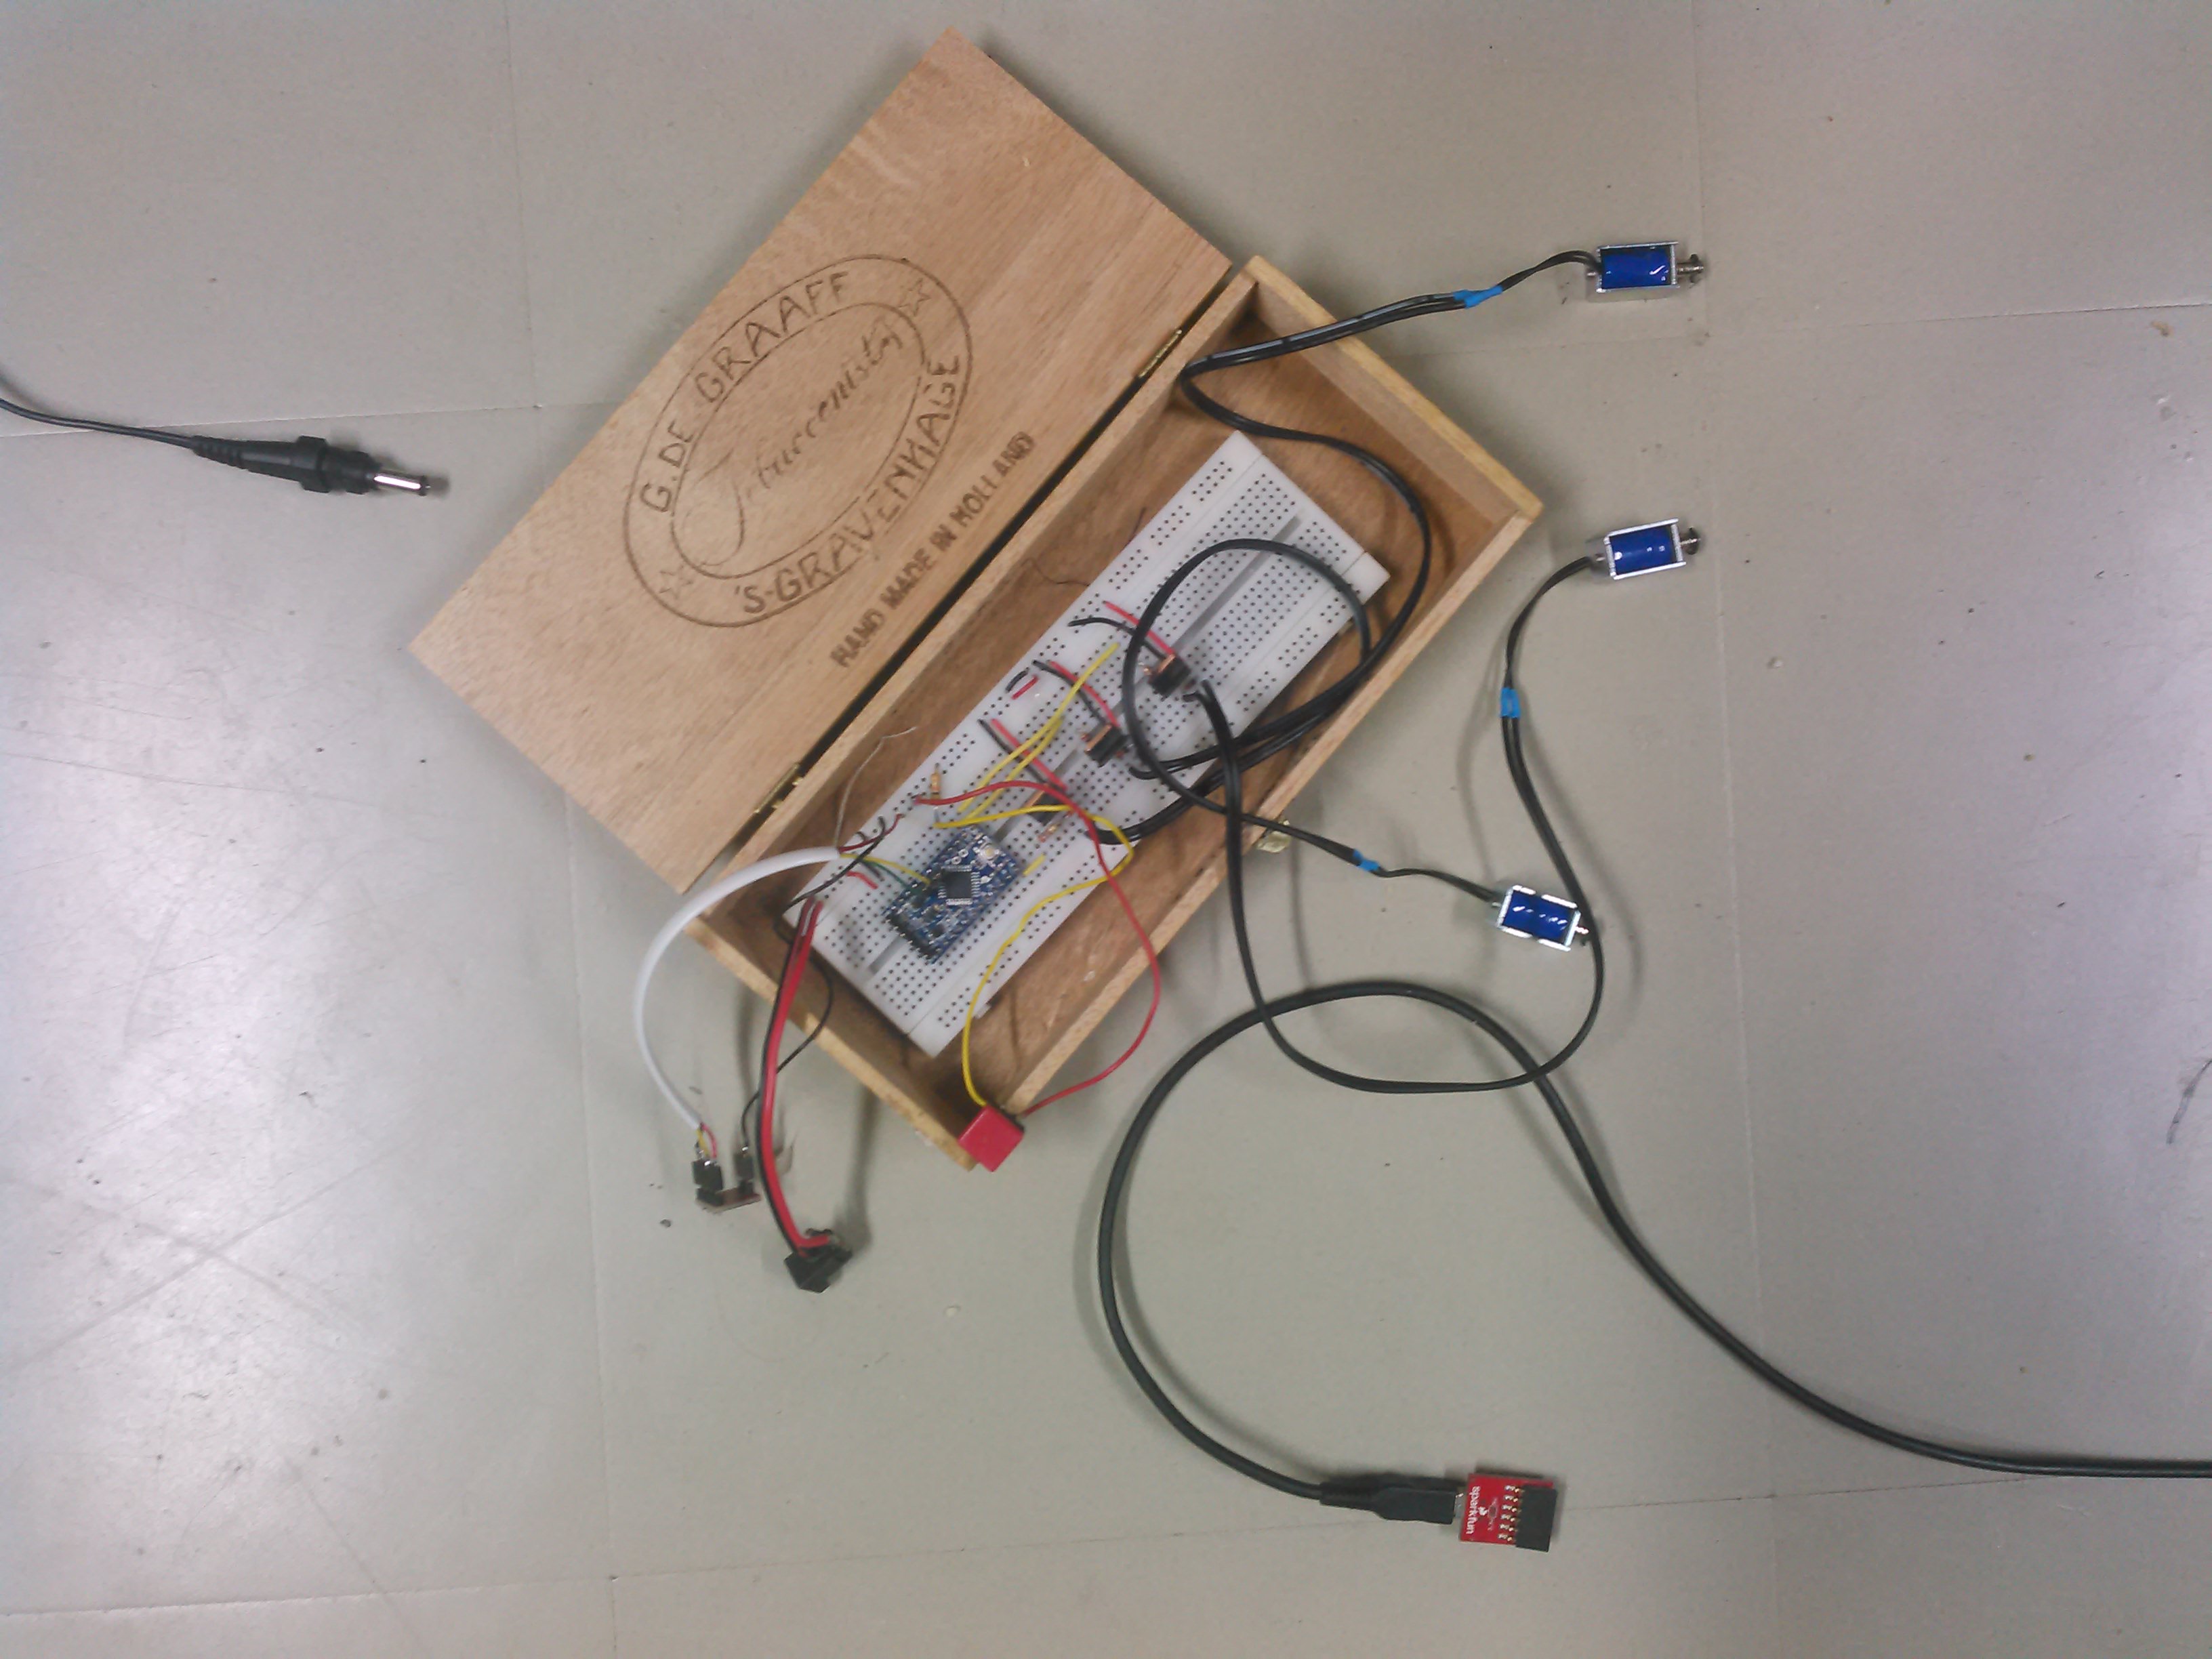
The (hopefully) final version of the electronics, it still needs to be tested though. Some prototype versions of the casing + tiny bolts glued to tiny solenoids, so that we can attach the eyes and beak of the bird a bit easier.
Apr 10, 2016Comments Off on 6.4.2016 progress: Askar & Niemi: Kinetic Furniture / Tray
The past weeks have been fruitful in terms of progress for the kinetic tray. We have been trying to figure out various ways of installing the dc motors to move the wheels attached to the wooden board. We have successfully managed to build a practical mechanism to make the movement possible. The physical work consisted of building the moveable tray by drilling and attaching the wheels to the wooden board, including making a steady holder system for the motors out of thick cardboard and metal wires. Thanks to Ville’s knowledge of programming for Arduino, he has managed to make a back and forth movement possible for the tray itself with the motors being able to move it across any flat surface.
Apr 6, 2016Comments Off on 6.4.2016 progress: Askar & Niemi: Kinetic Furniture / Tray
We decided, since some components took much longer than expected to arrive, to go for a prototype relying on projection rather than analogue means. We want to experiment with the videos visualized on the washing machine and test which are best and how to modify the videos during the wash. We also will experiment with different audio.
We have tried to use a projector to see how the mapping of the video will work and decide what videos are best to choose. We are working also to have a vibration sensor trigger the video, starting the projection when the washing starts, changing also the video depending on the amount of vibration.
This video shows some of our testing.
Apr 4, 2016Comments Off on Brainwash | Dirty Prototype 1
Since washine machines are a perfect example of replacing physical hand labour work with electronically enabled service, we thought it’d be interesting to add an element of tangible interactivity that responds to the electronic functioning of the machine/device. Inspired by “phenakistoscope“, we decided to explore analog ways to animate graphics on the interactive display.
For the first dirty prototype we decided to replace the see-through door of the washing machine with a rotating spinwheel that responds to intake of clothes into the machine, we also supplemented it with a sublime audio track of “meditative instructions”. In its working state, the moment the user puts their clothes into the prototype, it would rotate the spinwheel disc with graphics that got animated in the process, while playing the audio track that encouraged people to “relax and take a deep breath!!!”
Mar 26, 2016Comments Off on Towards second prototype
We connected the LED strip to the micro processor and wrote a code for two different time cognitions. One is based on HSL color space and changing brightness. Second one needs human interaction to project the clock hands. Both of them are already reading real time pace and translating time passage into the LEDs transformation.
Video1 showing mode 1. Fasten up 6 times from real time.
Video2 and pictures showing showing the idea behind using hand to project hour and minute and second clock pointers. Showdown of the hand projects time.
Next steps (for this week) are to look out for the best surface to beam the light on (experiment with different sorts of wood/plywood and paint). Also, this week we’ll implement the conductive sensor for the “interactive mode” in order to activate/deactivate the lights only when there’s interaction.
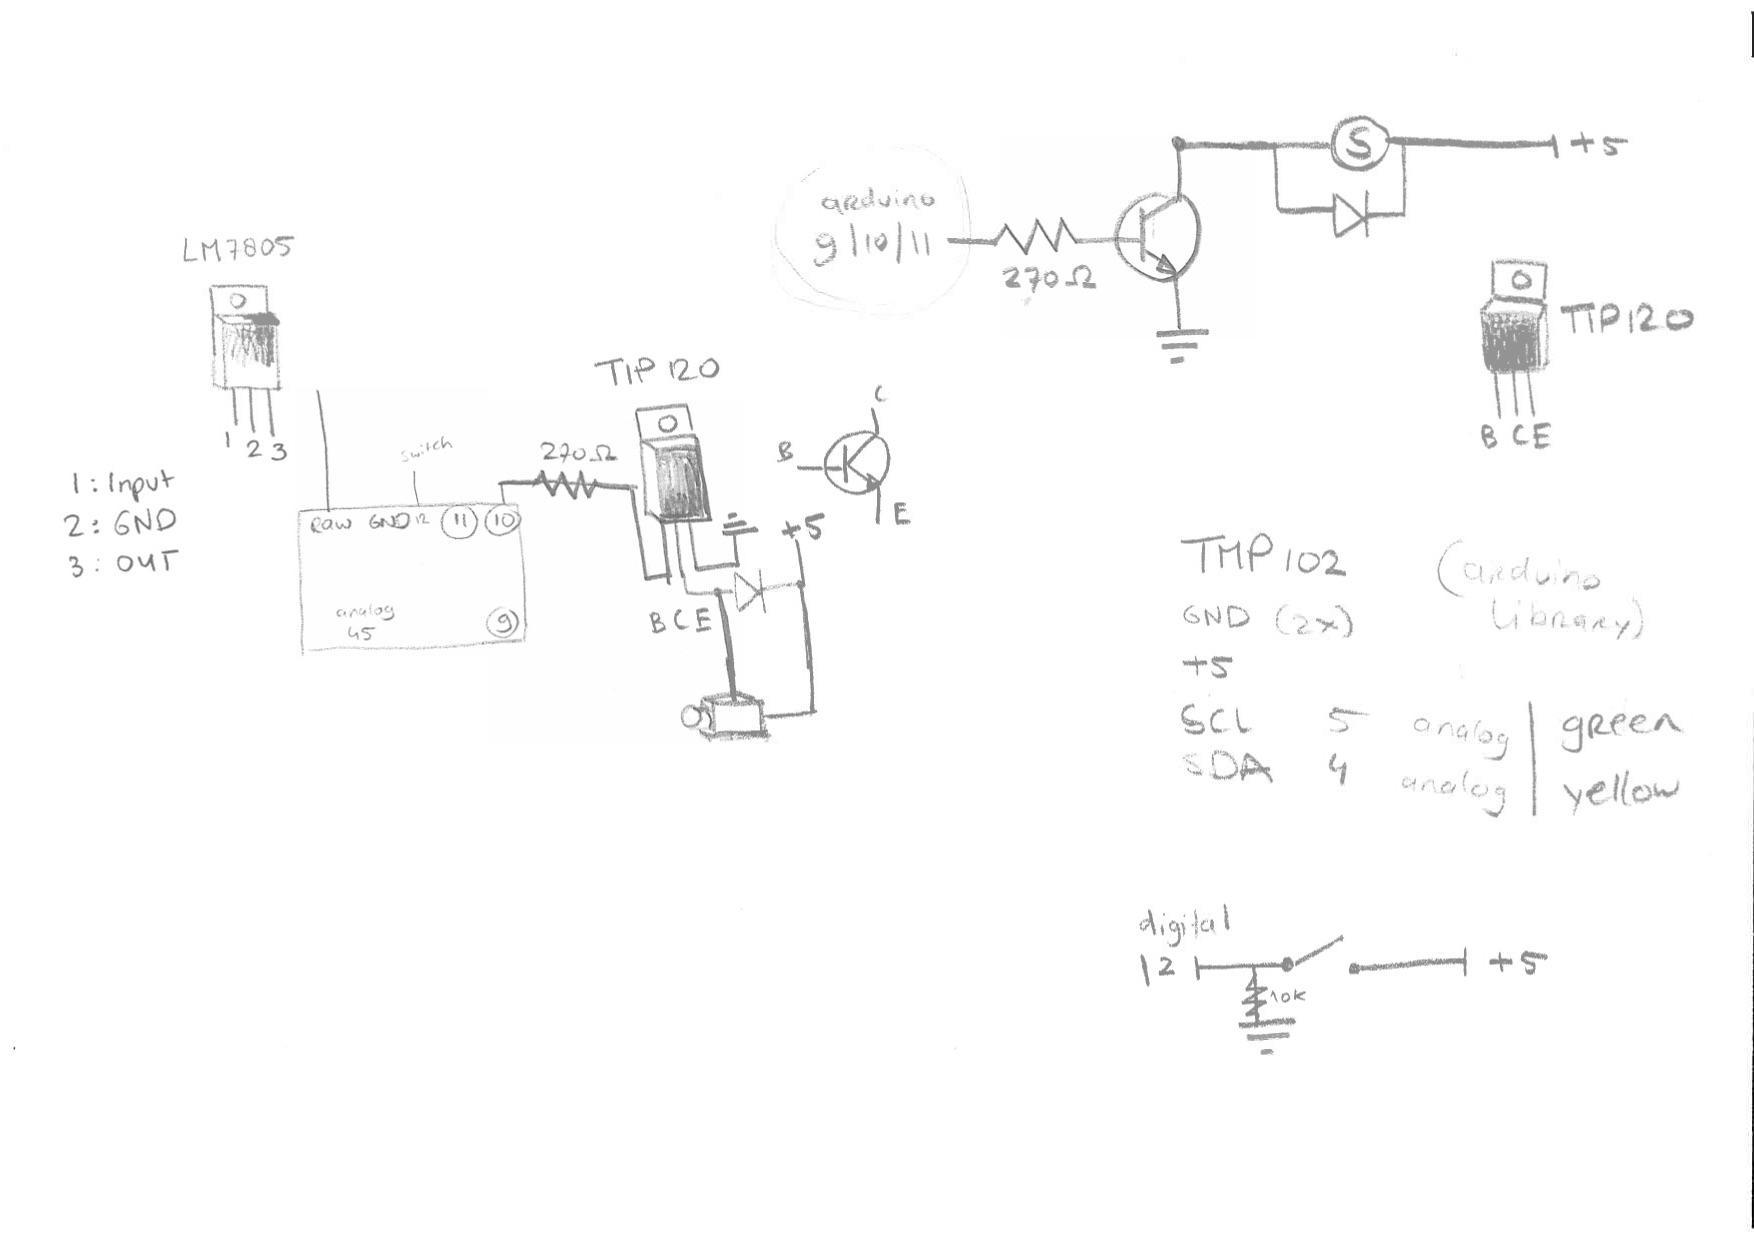
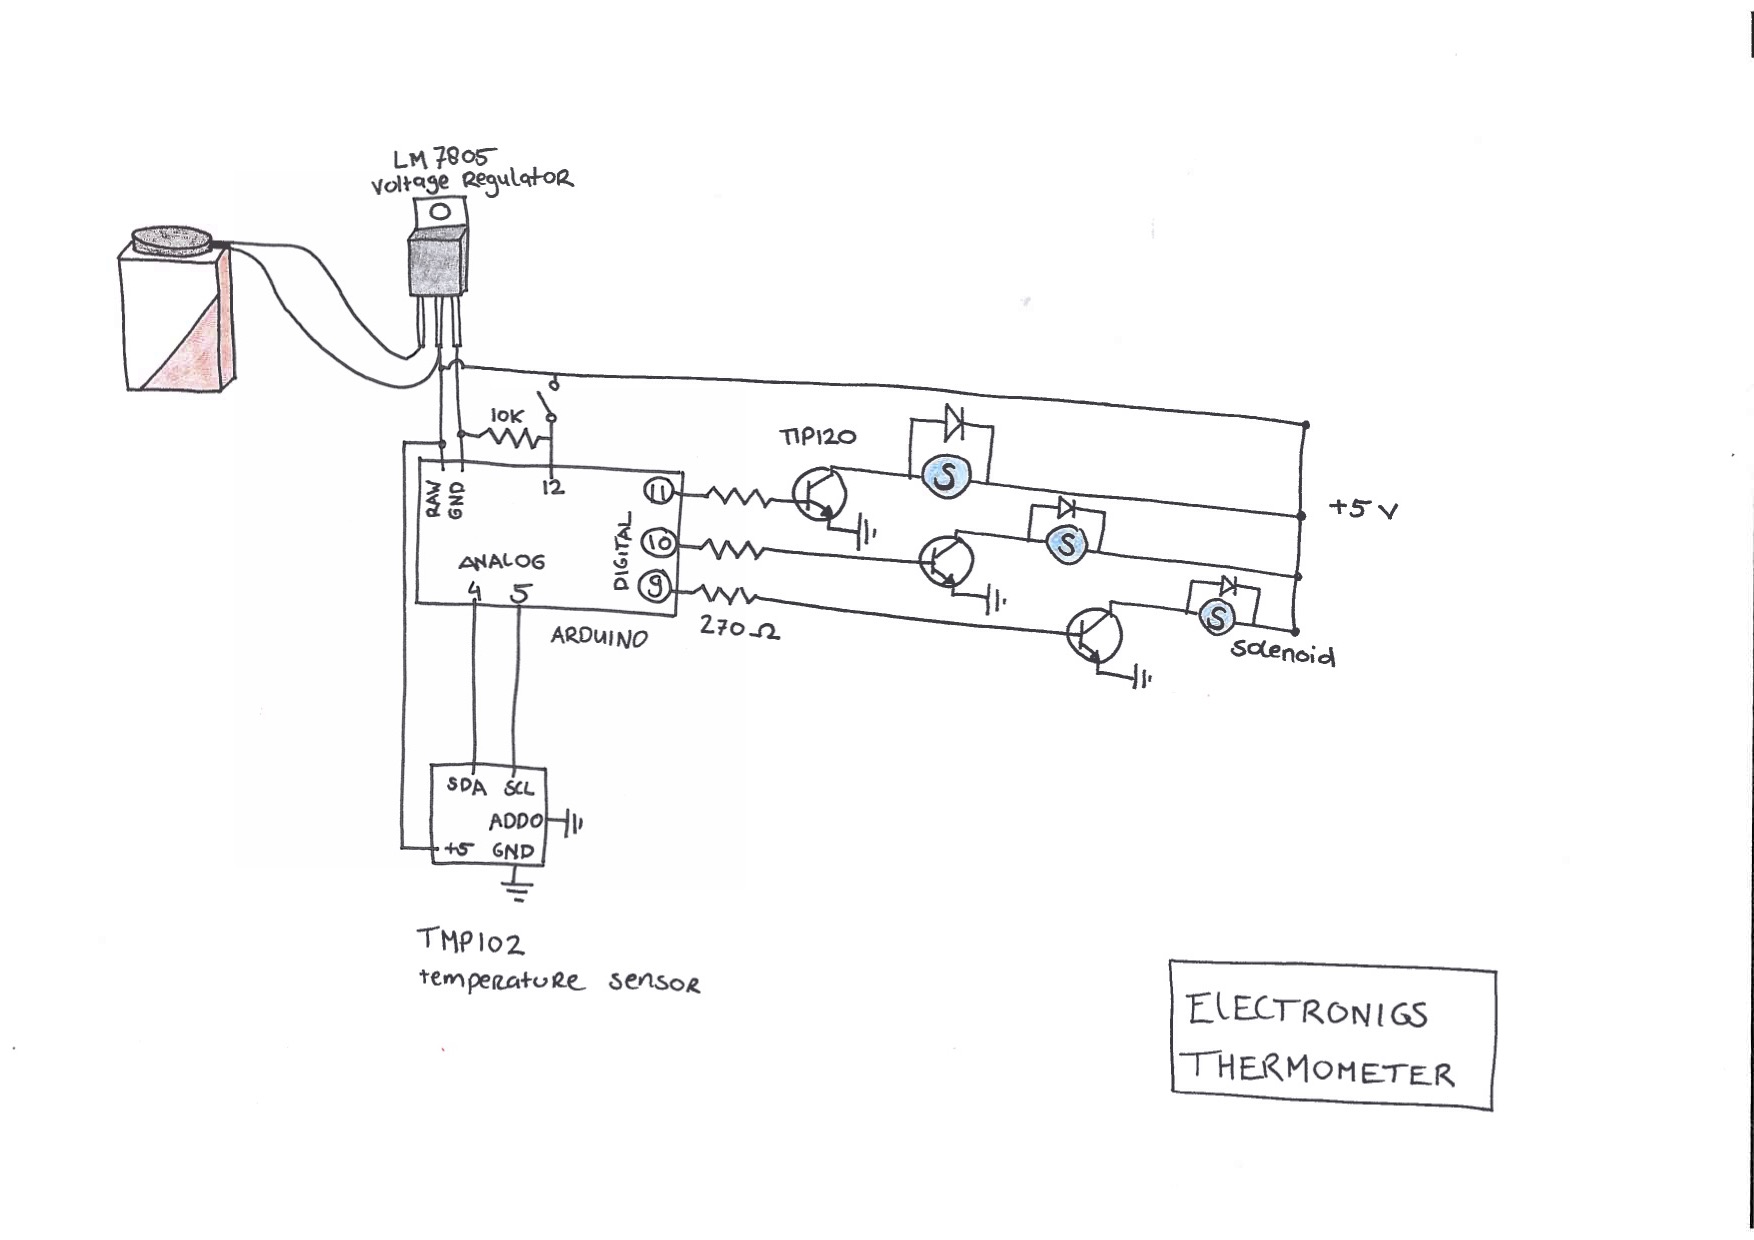
Mar 14, 2016Comments Off on Testing Thermometer Things
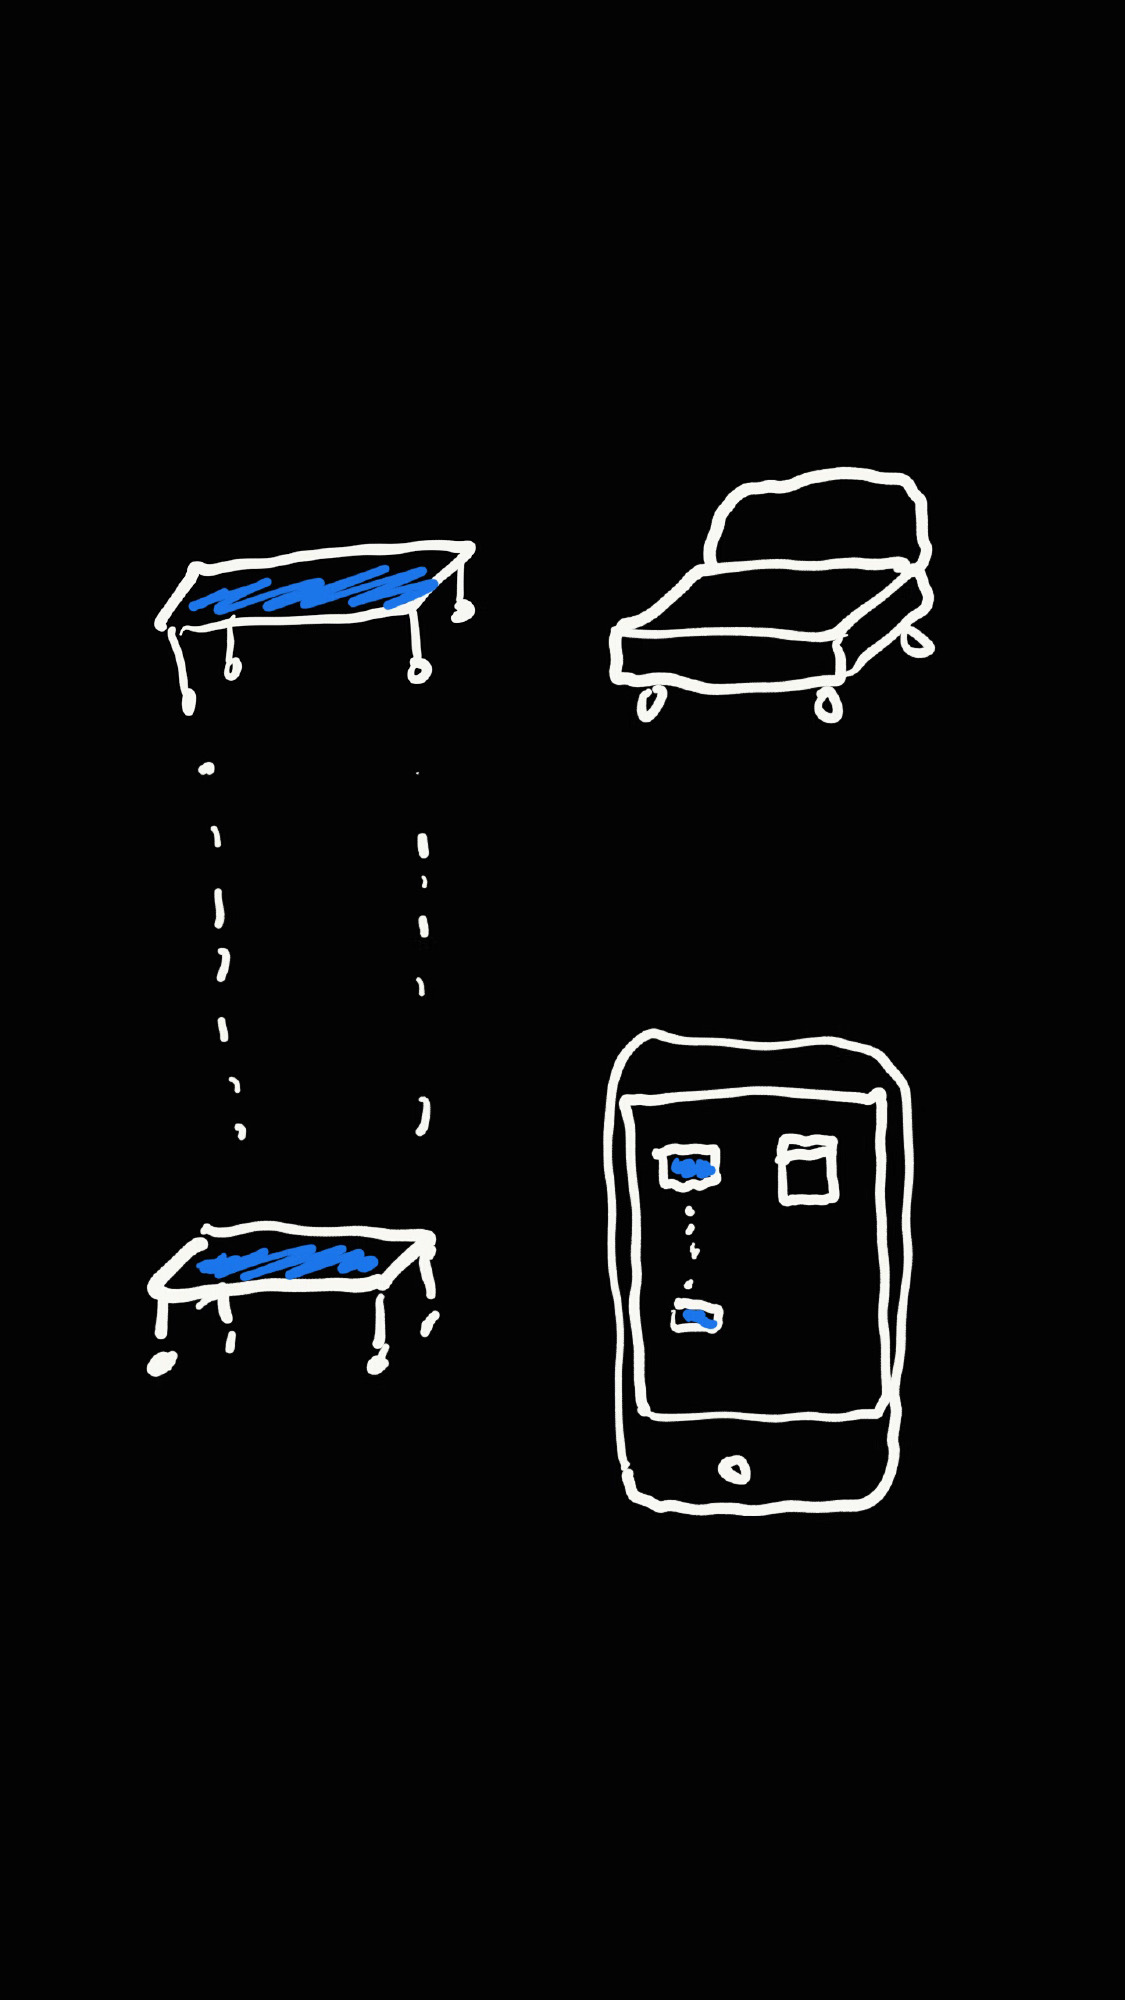
Where we are pursuing a table that moves kinetically rolling on motors, for the prototyping phase we have been creating a tray-like system (on which a table can be then put for example).
14.3. we finally got the motors, drivers and all together for testing the furniture. Turns out our cardboard structures to which motors are attached don’t hold strong enough.
Mar 1, 2016Comments Off on 1.3.2016 progress: Askar & Niemi: Kinetic Furniture / Glove-controlled
A test on having the motors controlled by a wearable. Here it is a glove, but why have the brains on an external device and not the furniture itself? Simplifies the system waaay more.
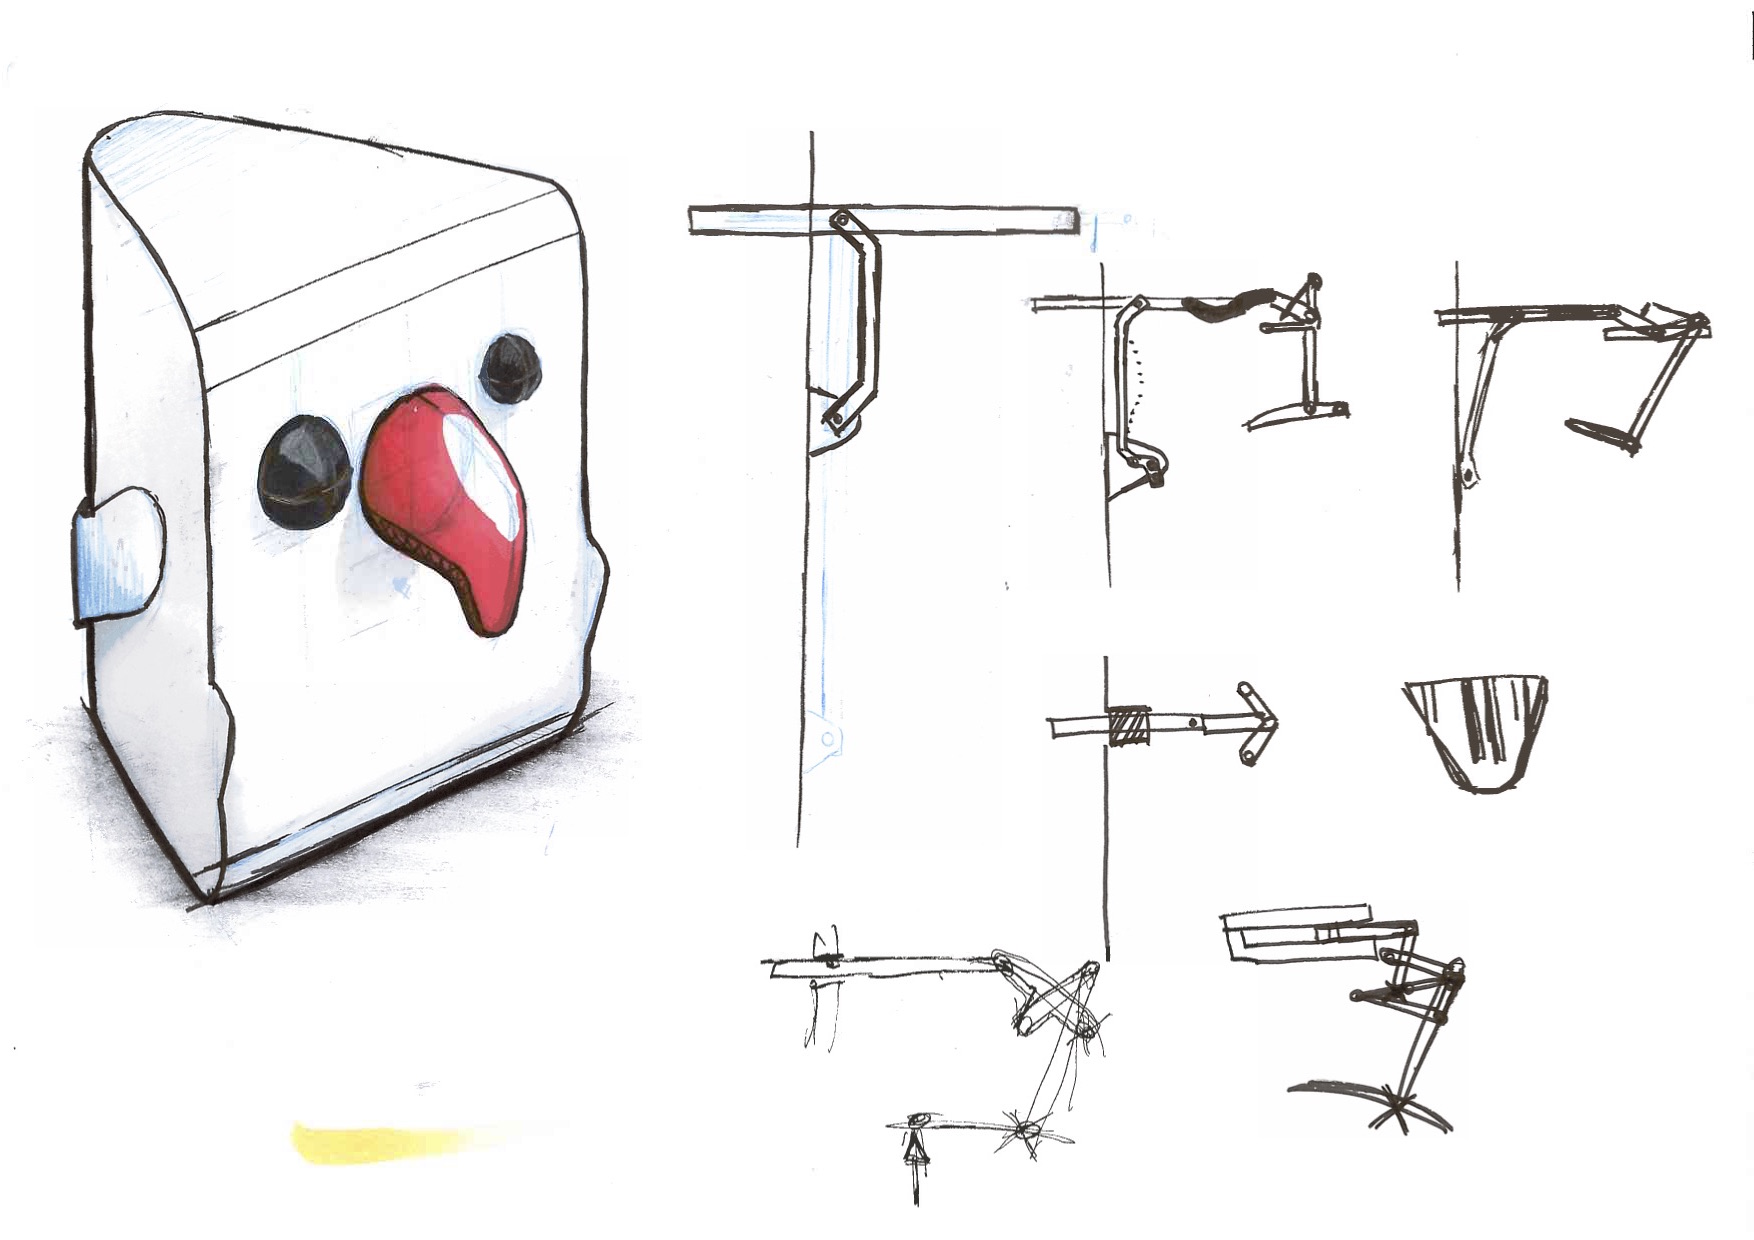
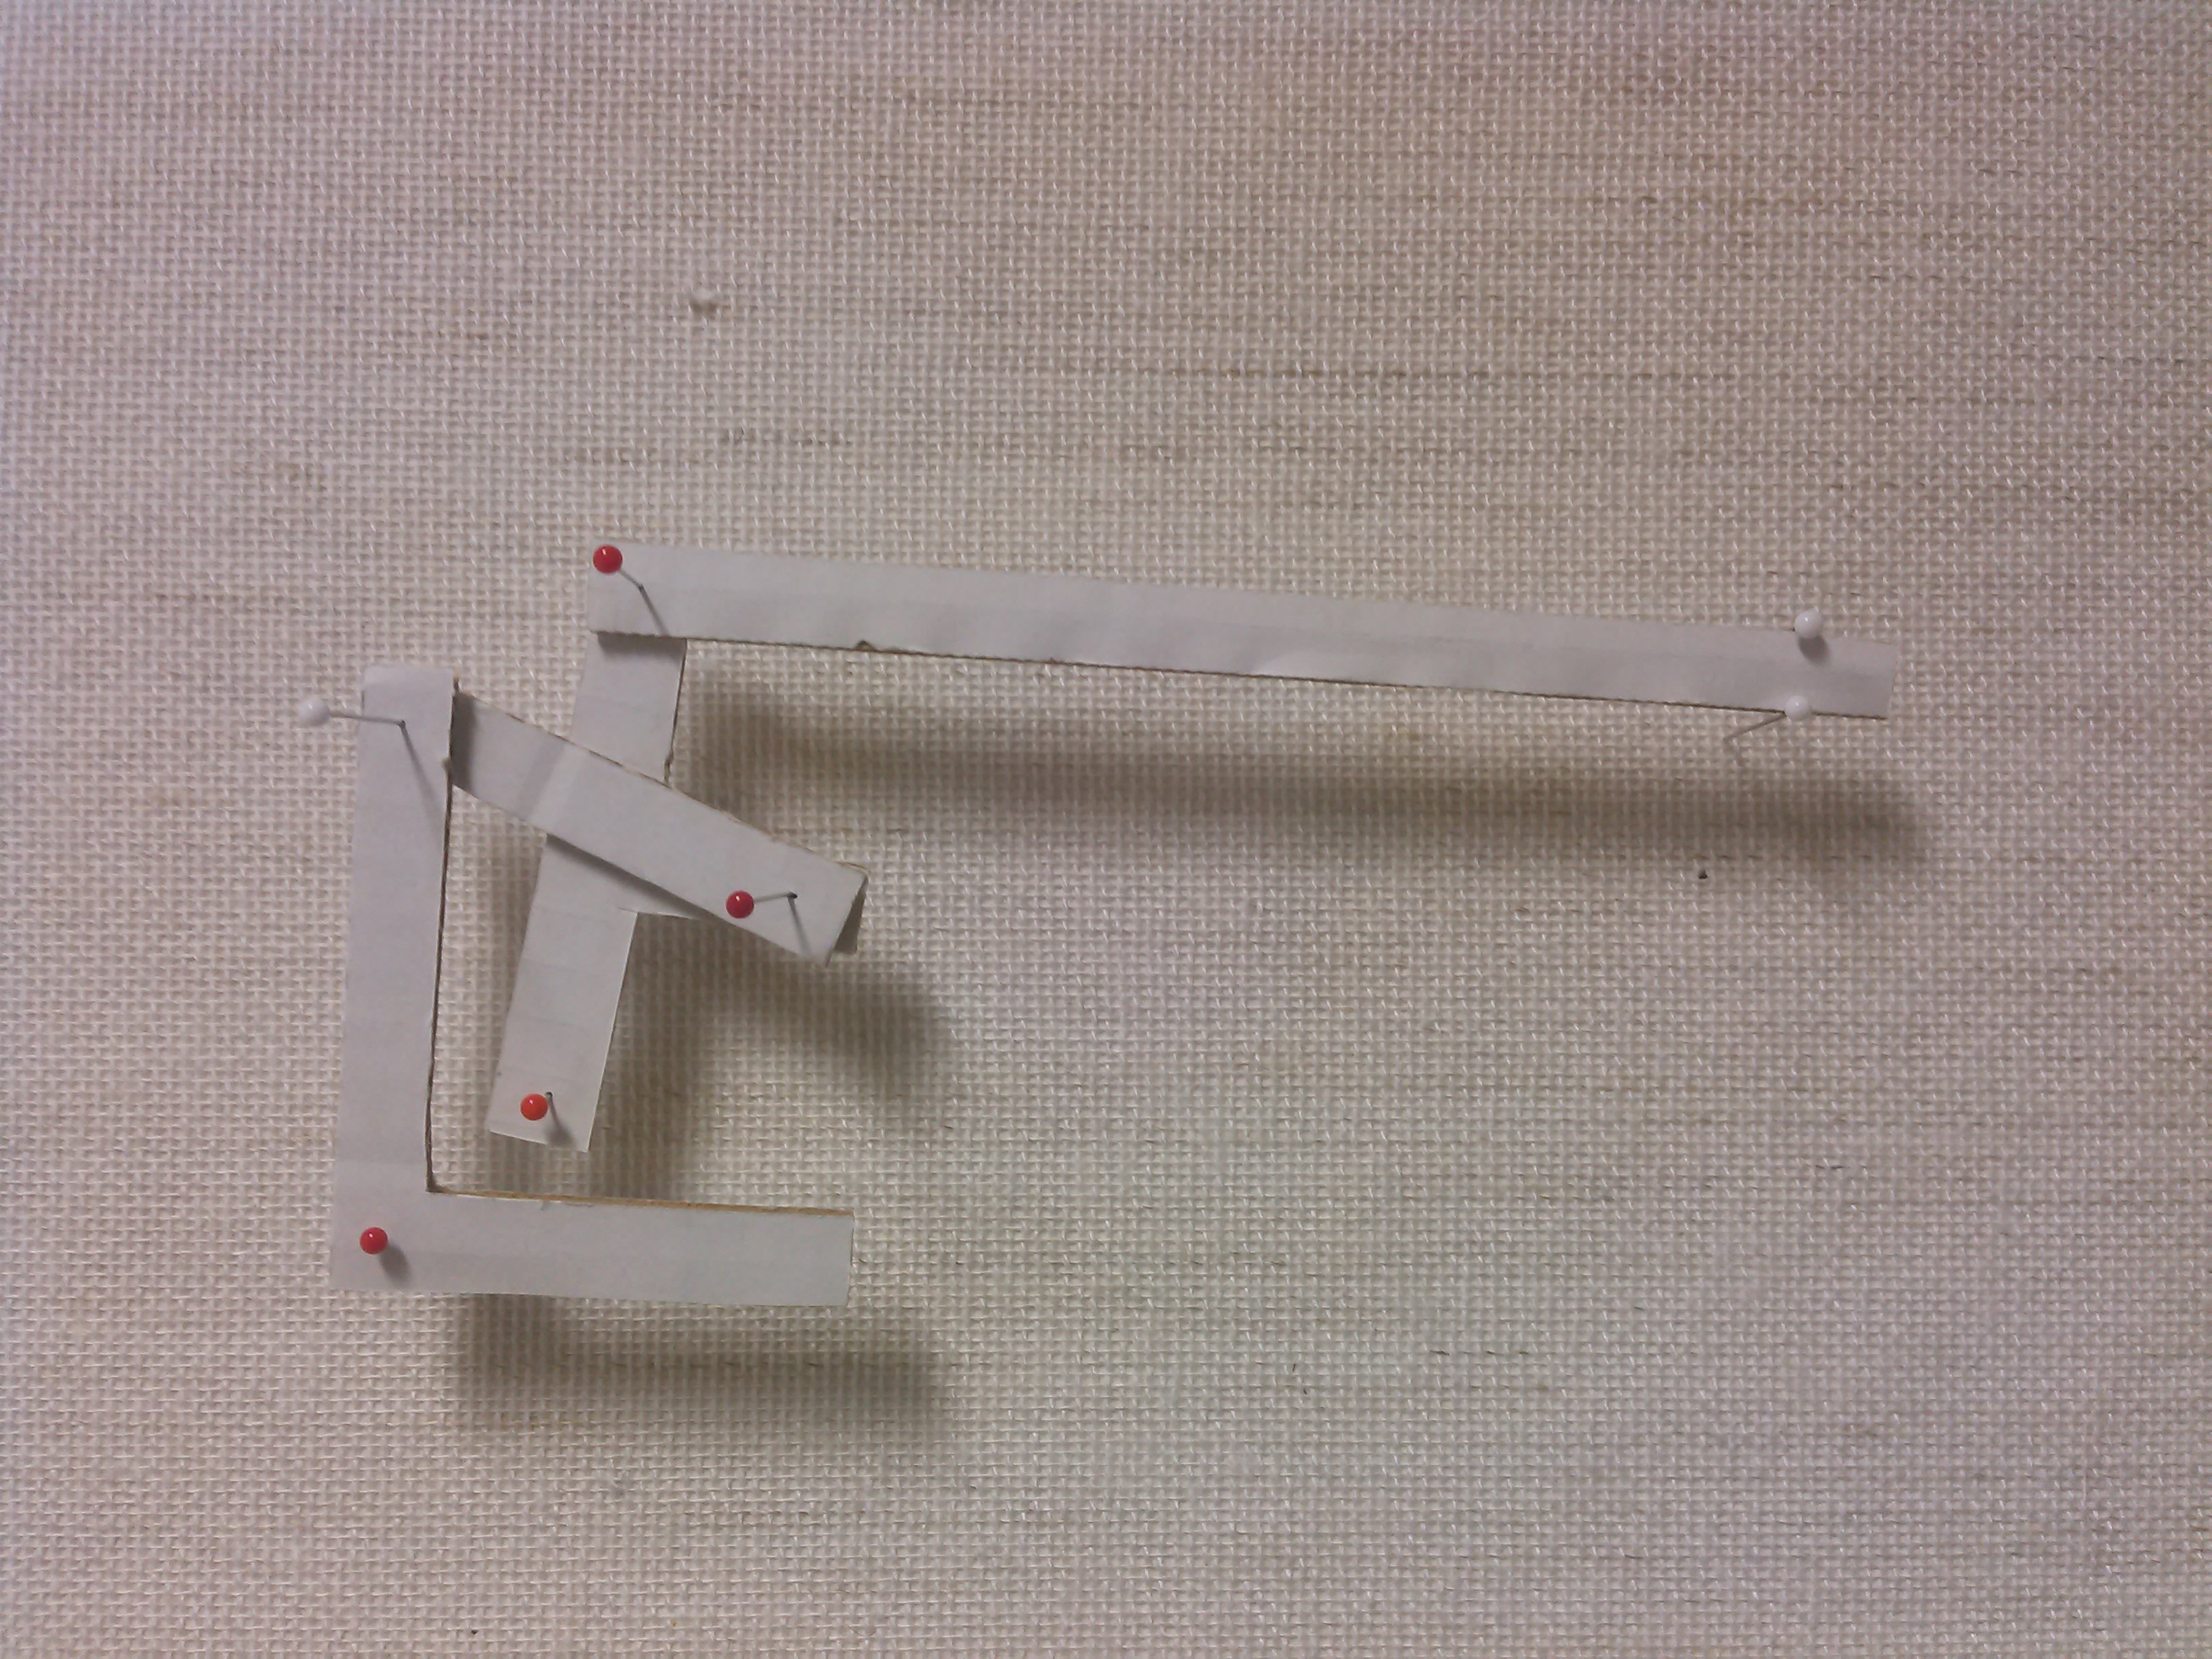
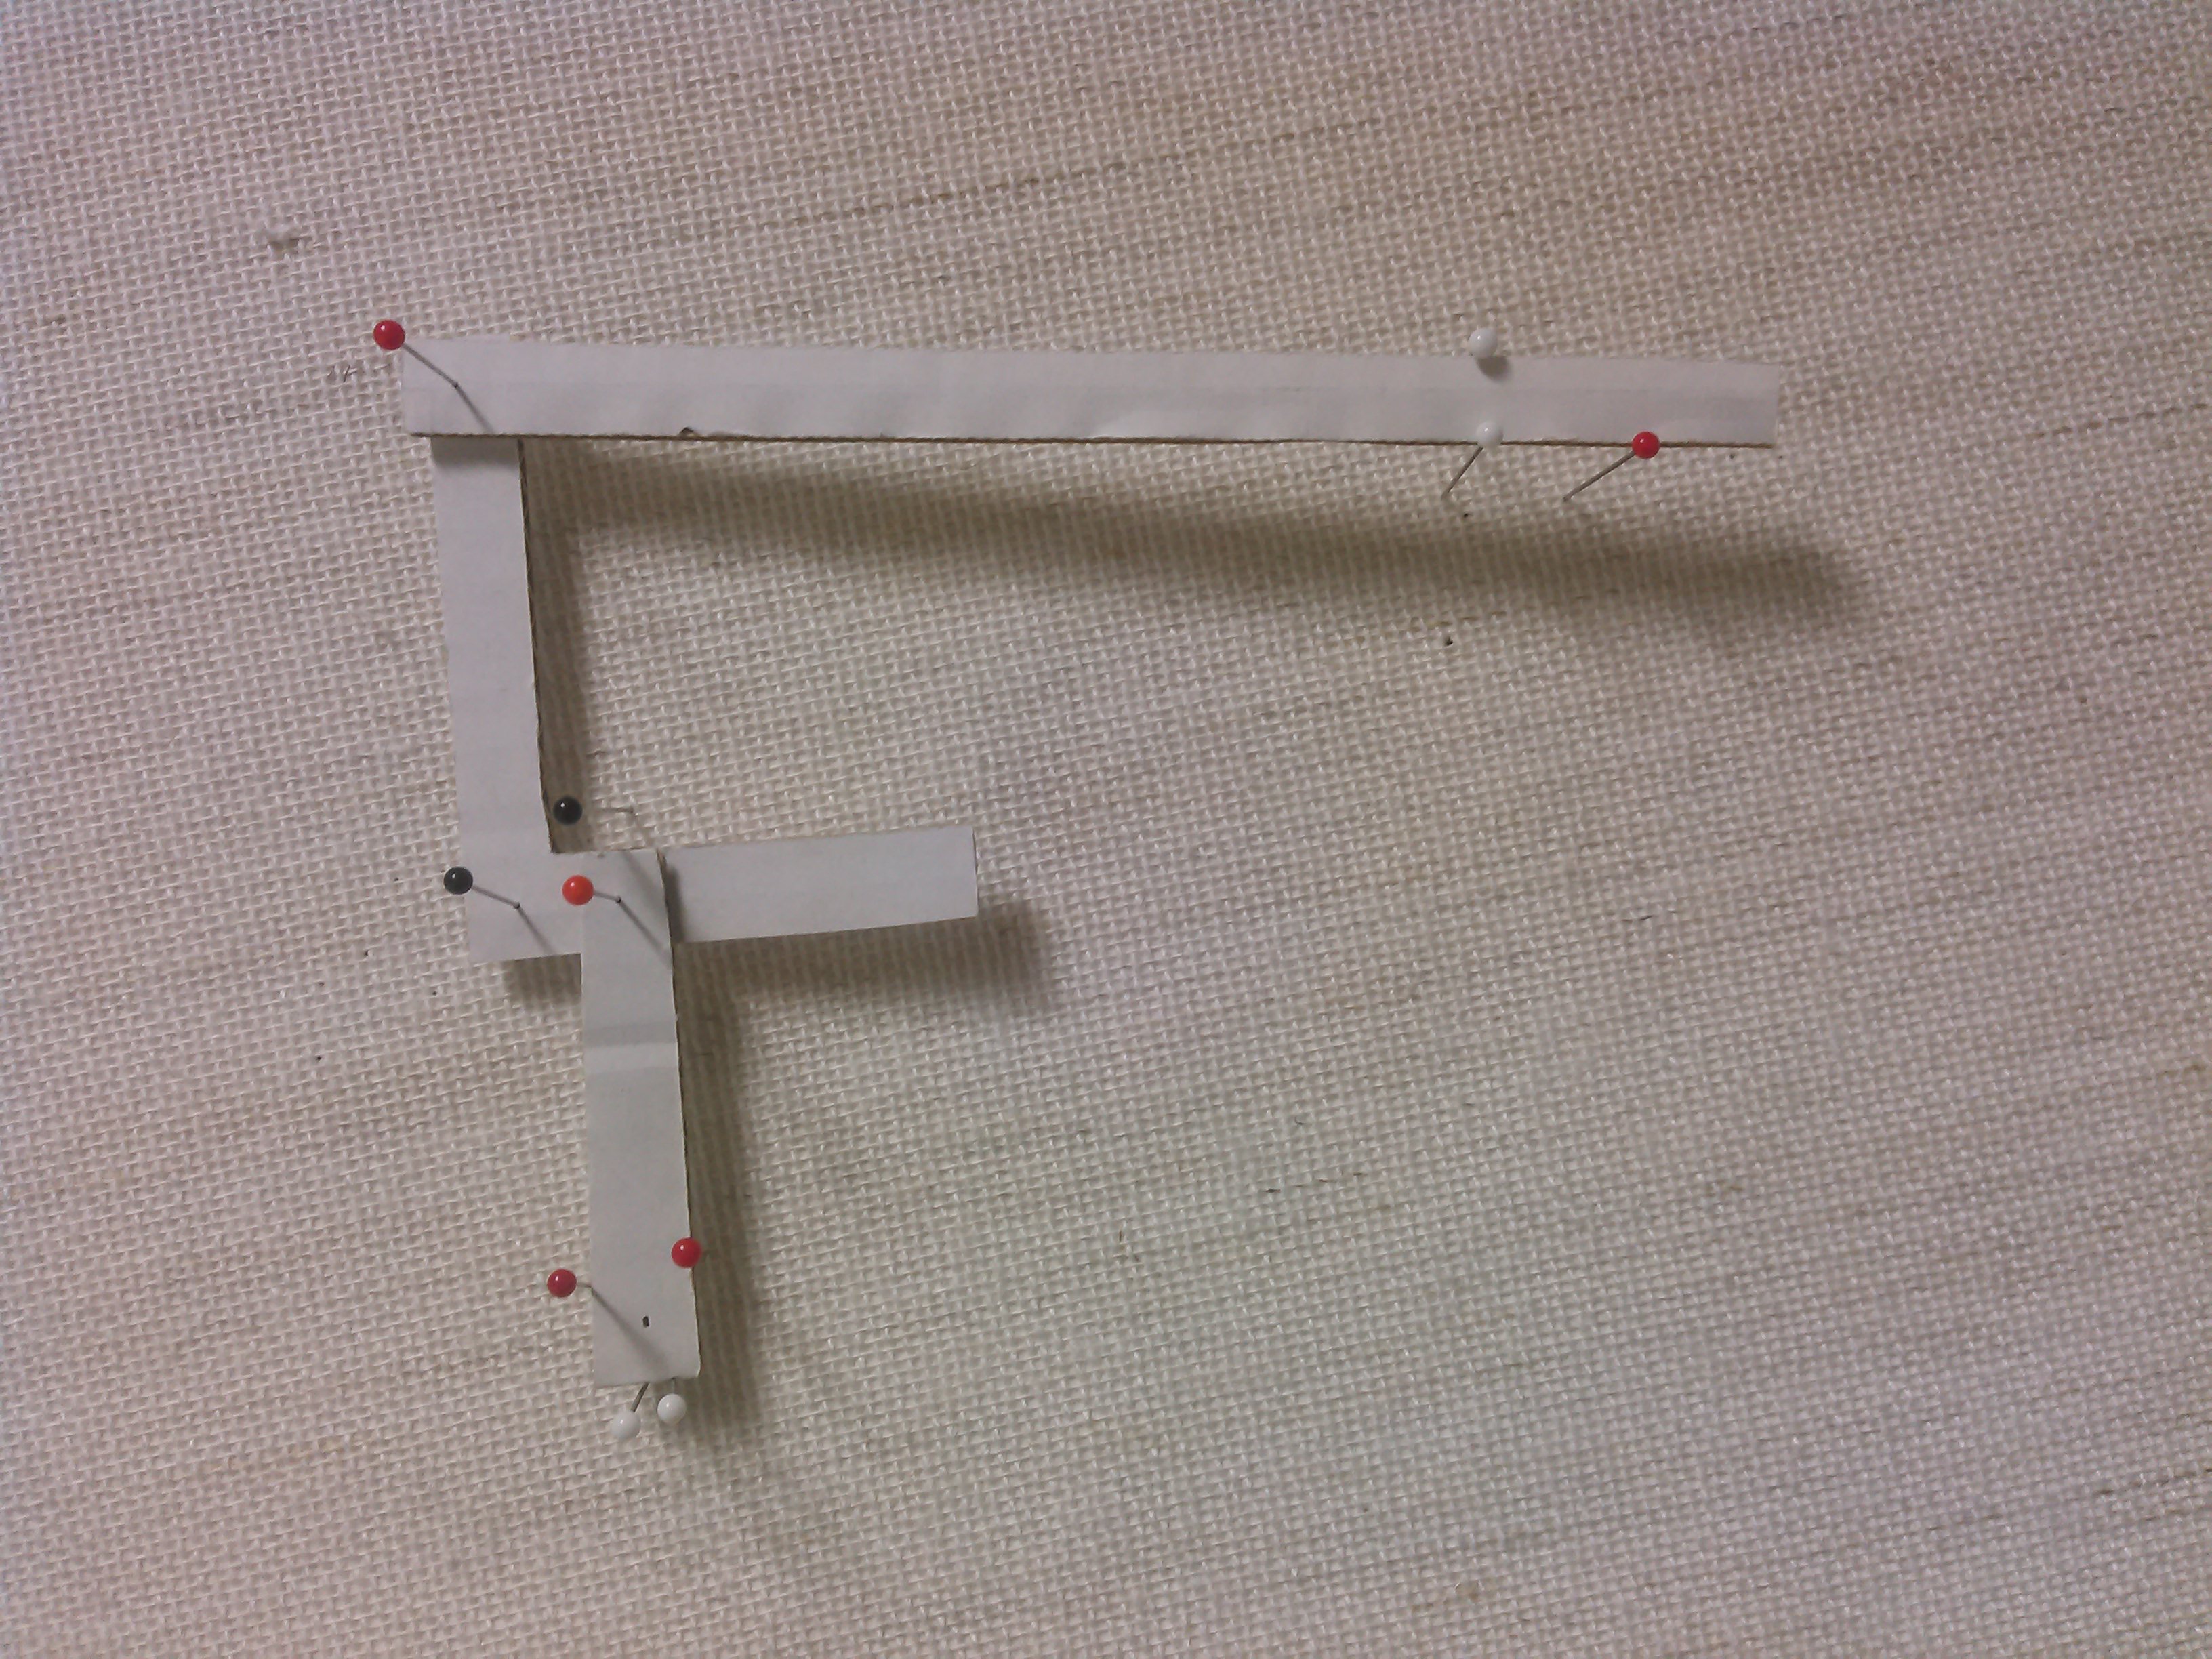
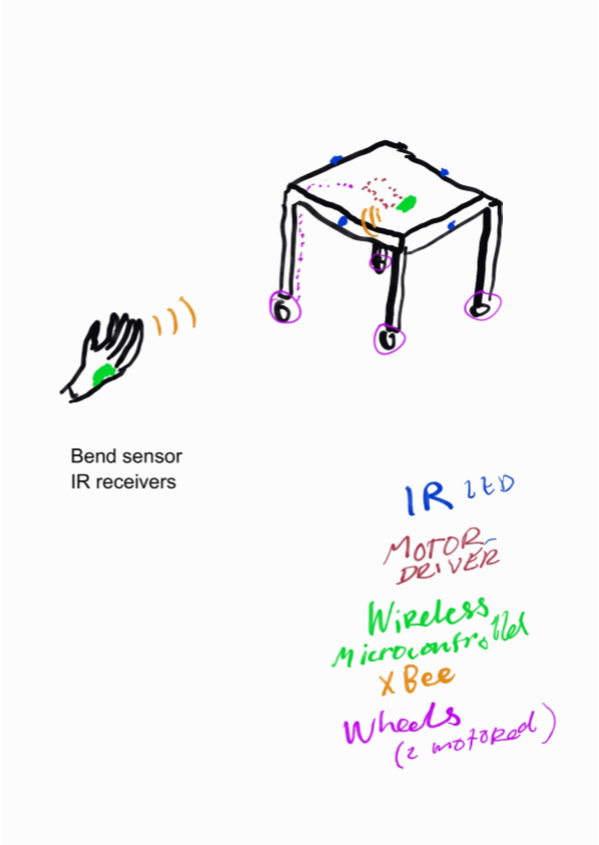
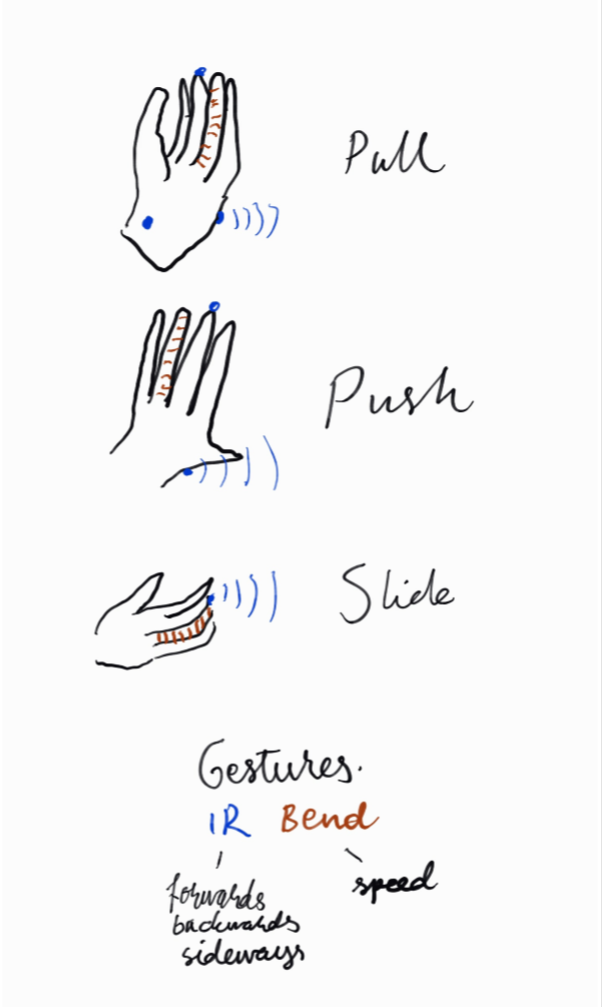
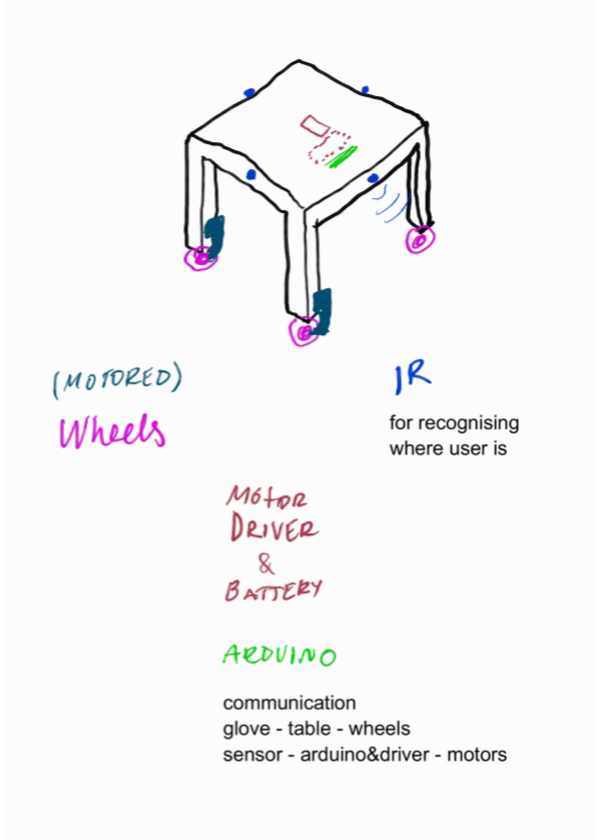
Feb 15, 2016Comments Off on Sketches, Calculations and Documention
Presented here are three sketches about the communication from hand to the wheels.
At the prototype stage the user will be using a glove to control the kinetics.
Also seems to us that the modularity of the kinetic item, the Table in this instance, is challenged by the parts needed for the functionality. We will however continue with the prototype having a “control centre” where the microcontroller, motor driver, battery and alike will be placed. For future development these parts should become much more portable.
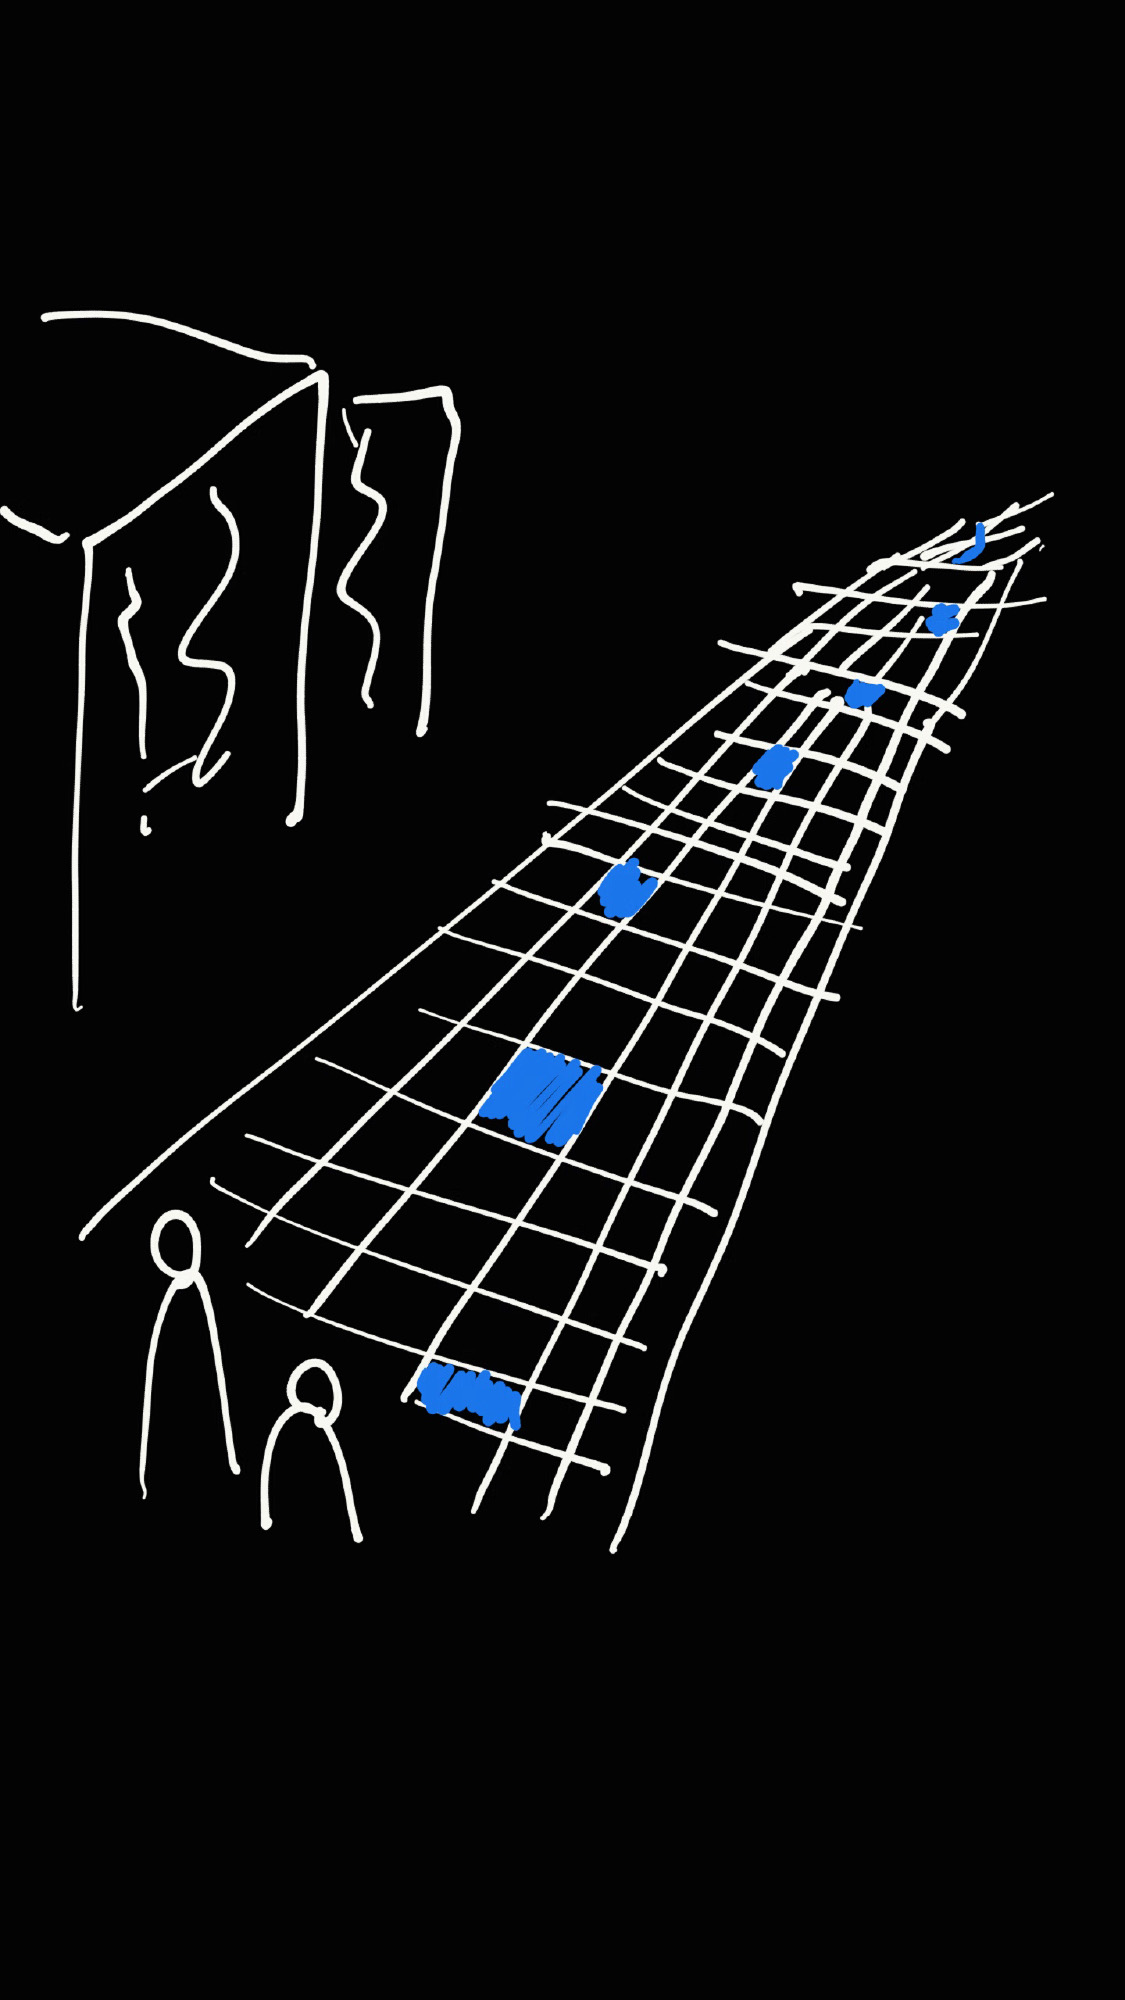
Jan 16, 2016Comments Off on 11.1.2016 presentation: Queue ticket machine by Eduard & Petteri
-A user presses the button to get a queue number
-The hidden camera takes a picture of the user
-The picture is processed using the face detection
-The queue ticket machine prints the ticket with the queue number and the processed picture of the user
Jan 14, 2016Comments Off on Brainwash by Soujanyaa, Elisa and Siying
Change the behavior of people doing their laundry through the introduction of a playful element.
We want to add a new possibility for curiosity and interaction to break the repetitiveness of washing clothes through a machine, especially in common areas in student apartments. Our project would change the interface of a washing machine altering its general appearance and meaning.
Brainwash project:
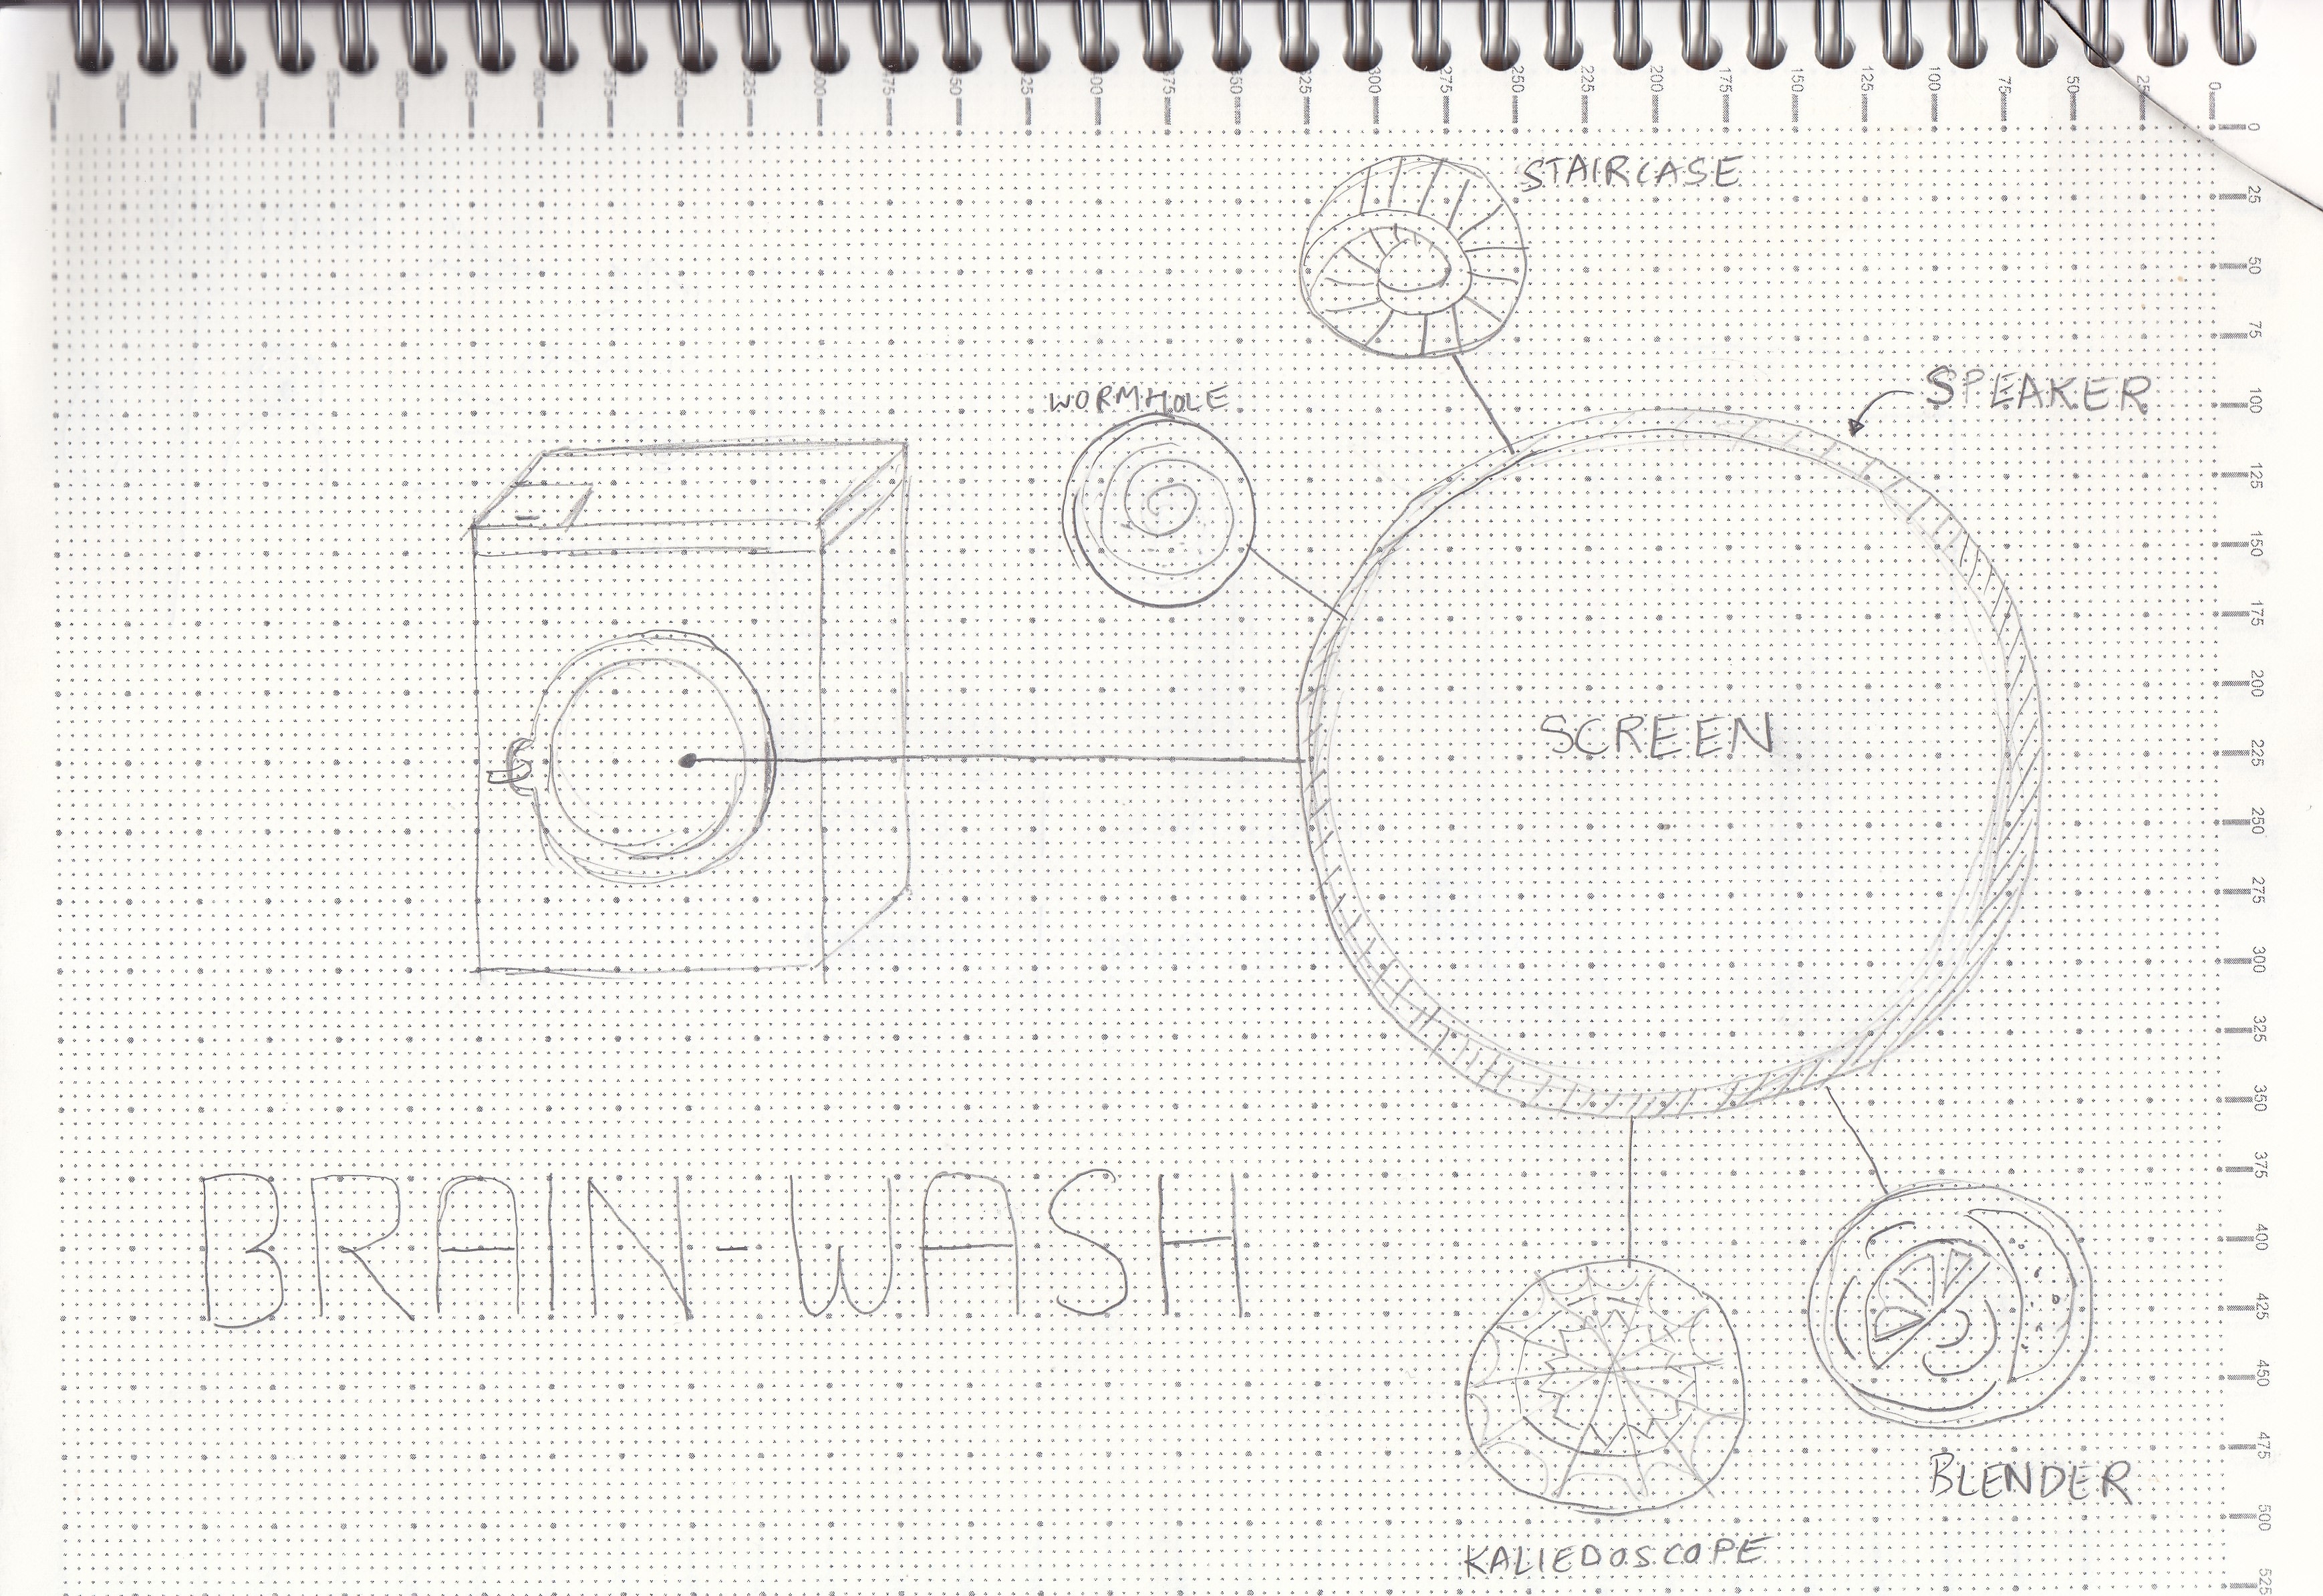
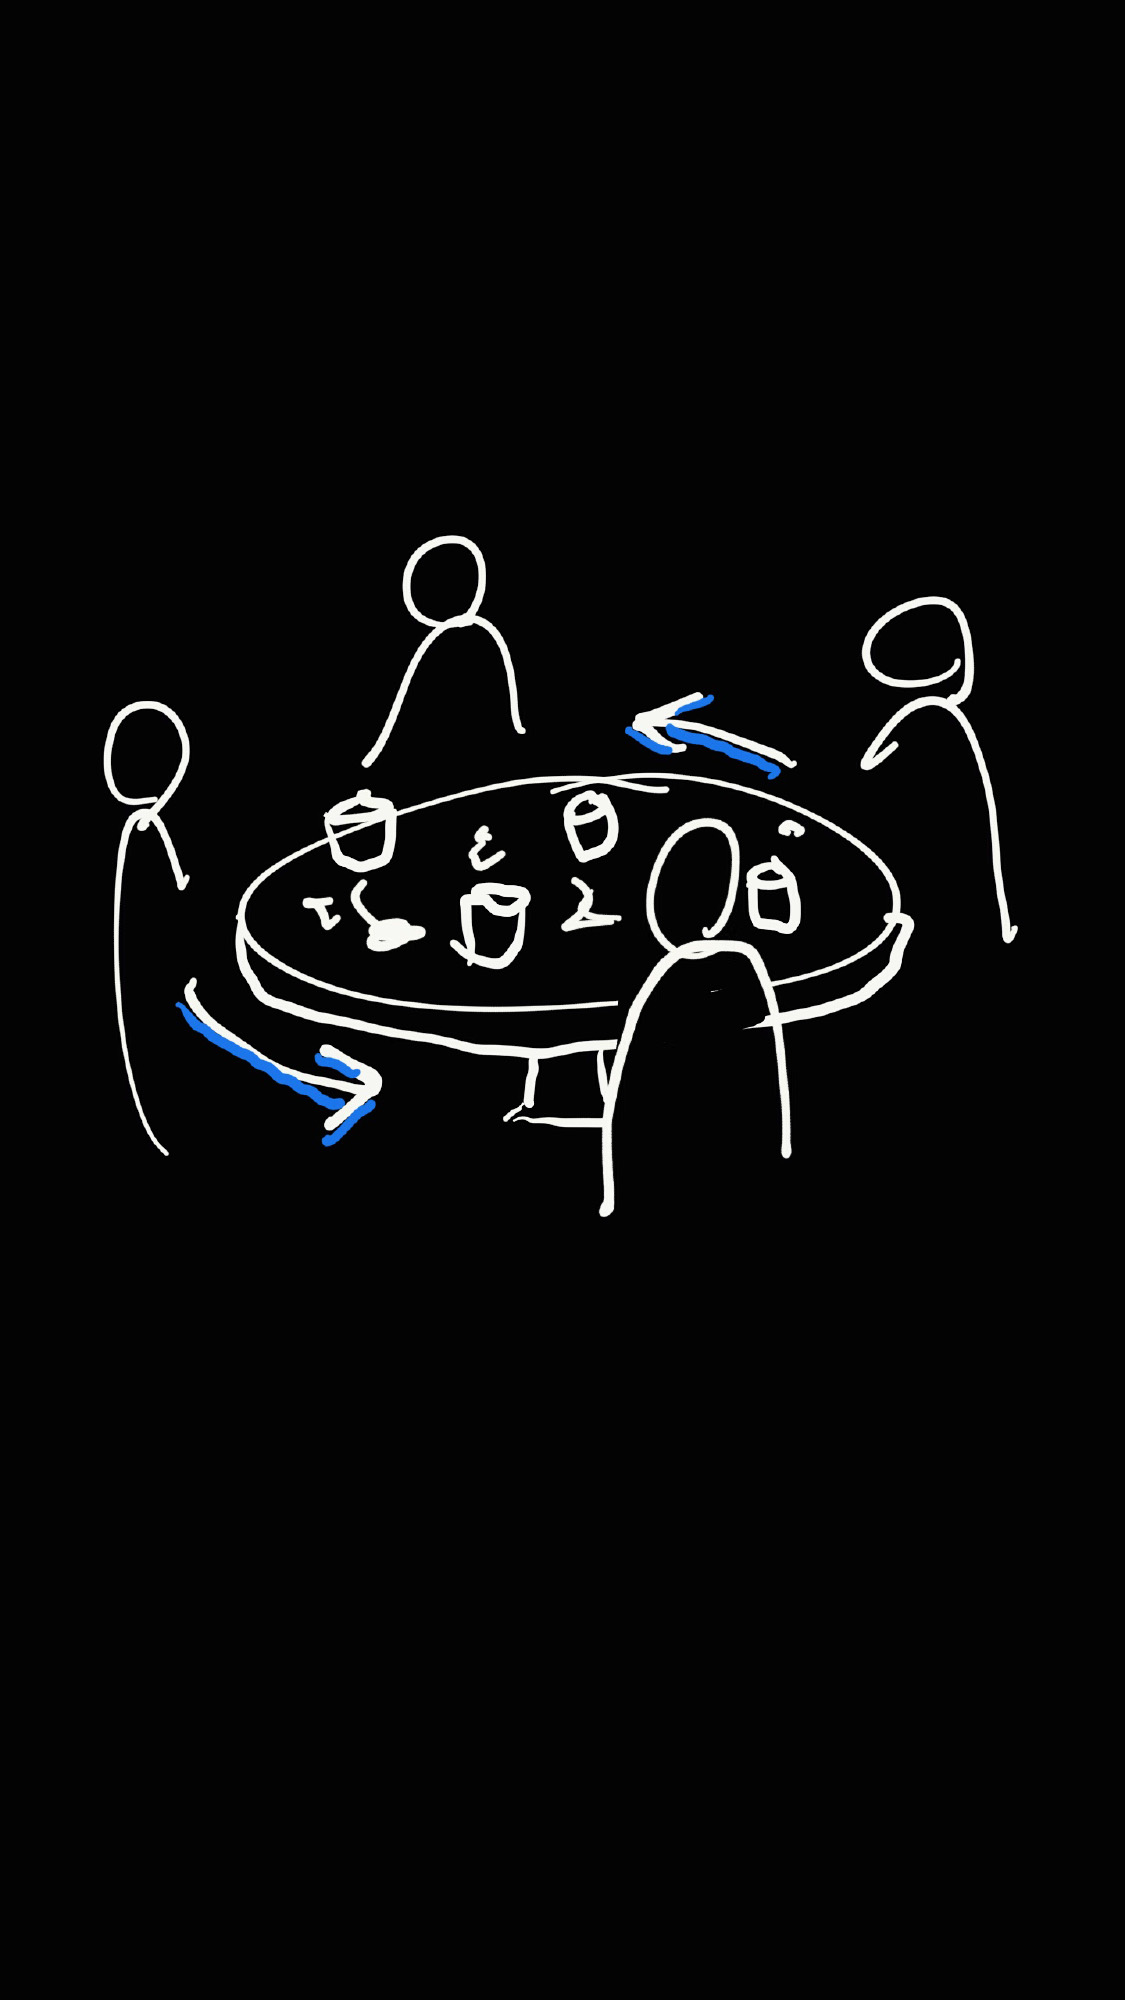
The project replaces the usual glass door of the washing machine with a visual display. It will show a variety of changing videos, accompanied by audio, creating unexpected visual scenarios. For instance a wormhole suddenly spiraling into the void, or a mixer, or kaleidoscopic visuals, and so on. The audio could be an hypnotic voice suggesting that you relax and concentrate on the moving spirals forgetting all your problems, or ominous suggestions, or relaxing and calming, or other.
The video and audio would be sensitive to the washing machine’s rhythm and noise, giving in this way also a direct feedback on the state of the washing as if you were looking through the usual glass. It could also give insight regarding the washing’s timing, if it is at the beginning or near the end.
Behaviour:
Brainwash would introduce novelty in the repetitive and monotonous task of laundry. Especially for students it would make it more appealing and fun. The curiosity and experience generated by this will change the perception of the laundry’s space and routine. The interaction is not well defined however, and it would be very interesting to observe how people react to it. We hope that a new visual value to this space would create a new awareness and positive attitude towards the maintaining of it (referring to the student common spaces).
Jan 12, 2016Comments Off on 11.1. presentation: Time cognition throughout light by Fernando & Maja
Design an object that doesn’t display time in a precise way, but shows time in motion with a help of light. User could set motion of time by it own desires. The act of trying to read and measure the message of the object would be the playful element, making users stop for a moment to think about how time is passing on their daily routine.
people use thermometers before they go outside, to check how much clothing they should wear
use of thermometers increases with extreme (hot and cold) temperatures
when extreme weather / temperatures occur, many people seem to feel the urge to post images of thermometers online
Behaviour changes:
takes away for the need to walk to the thermometer and look at the thermometer consciously, it allows you to perceive the temperature everywhere in the room without a conscious readout
The use of rhythm and / or music has the potential to change people’s moods
Playfulness:
gives an abstract impression of the temperature, instead of an exact number, the feeling can be directly translated to the feeling outside.
music / rhythm is playful.
attention seeking thermometer
Description of the idea:
thermometer / knocking / alarm clock The thermometer has a helpless moody personality, he needs attention all the time. He keeps knocking until you take him inside, this way you feel the real feeling of the outside air, the wind, the humidity, … as the thermometer only tells temperature. You can feel the thermometers feelings this way.