Nov 12, 2007
gimme sugar
 _
_
Idea: a gesture controlled sugar dispenser.
Depending on the angle of tilting an object, shaped like a sugar shaker, a bowl placed elsewhere is opening and dispensing sugar. The more you shake/tilt the object the more sugar will be dispensed. This could be a fun way to sweeten a beverage or represent how much attention in form of sugar one gives to a significant other.
(Image by Juho Jouhtimäki)
The input: Tilting the shaker, touching the shaker
1. MX2125 Dual-axis Accelermeter; purchase at www.parallax.com
datasheet
2. 2 LDR (light-dependent resistor)/photoresistor/lightsensor; purchase at www.bebek.fi
The Output: A valve opens, LEDs blink, the shaker vibrates.
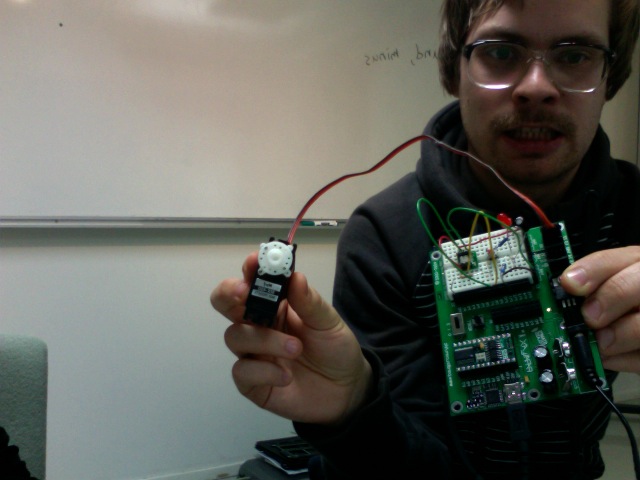
1. Servo motor (MX400), purchase at www.parallax.com
2. LED, purchase at any local electronic store
3. Vibration motor, Nokia 3310
Final prototype v 1.1 for the Media Lab Helsinki Demoday WS07
watch the video:
(Image by Juho Jouhtimäki)
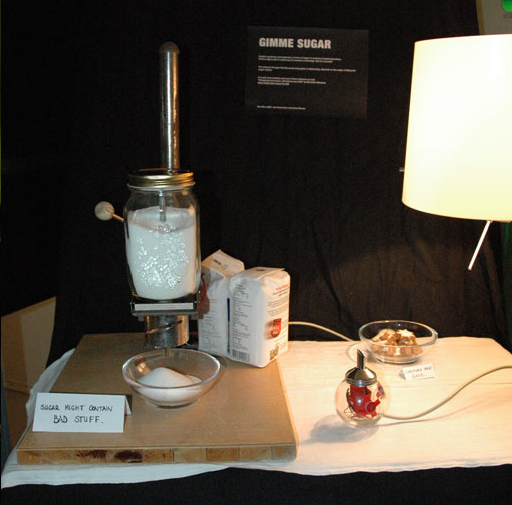
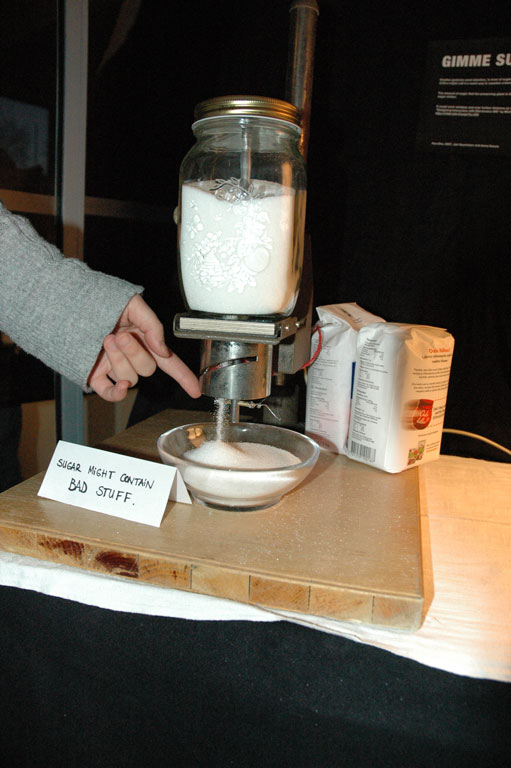
The final prototype, used two separate items. The sugar shaker and the sugar dispenser.
Shaker:

The accelerometer and the vibration motor are secured on the pipe inside of the sugar shaker. The angle of attaching the accelerometer depends on how you use the sensor in the code. The two photo resistors are attached on the inside wall of the sugar shaker. The sides and backs of the sensors are sealed for exposure to light. The photo resistors are placed so that natural grabbing of the shaker covers at least one of them.
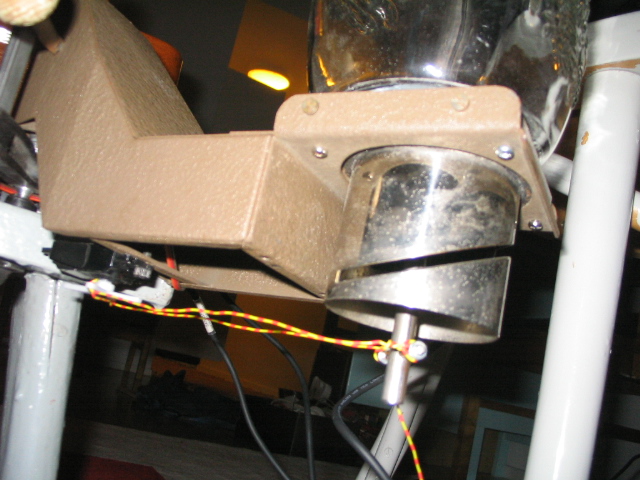
Dispenser:
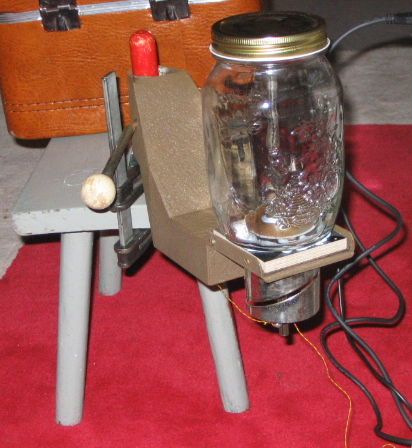
The Basic Stamp Board is mounted to the sugar dispenser. The servo motor turns an axle inside of the dispensing glass. The axle is attached to a round plate with a small hole on the bottom of the glass. Once the axle turns, the plate turns and moves the hole in the plate above the hole in the dispenser glass. This allows the sugar to be dispensed.
The glass is attached to the stand so that a bowl can conveniently be placed underneath of it.
 _
_
Actions and Feedback:
Shaker is in someone’s hand –> LEDs light up on the dispenser.
Shaker is tilted –> Sugar is being dispensed, vibration motor is active, LEDs blink in sequence.
No more sugar is in the pipe –> Dispenser stops dispensing sugar, vibration motor is inactive
Tilting the shaker into starting position –> Vibration motor is shortly active, The shaker’s pipe is full again, the user can give sugar.
Code:
The software controlling the dispenser is a loop that is executed again and again as fast as the Basic Stamp allows. Delays (i.e. opening time of the valve) are implemented with counter variables. The software calculates the right amount of loop cycles that the delay should last. This way, we can read the sensors concurrently while controlling the blinking lights and the servo motor because the Stamp never pauses.
Take a look at the code of Gimme Sugar:
Thanks to the lasipaja in TaiK we were able to drill three holes into our two glass items.
TIPS:
* Enjoy what you are doing while you are doing it! 😀
* A “capacitor + rctime-commandâ€-solution may not be suitable for people who only want to know when the photo resistor is masked or not and don’t have interest in the exact value of light on the sensor. The loading and recharging of the capacitor takes time every time the value is read. You might not have any of such – at least for us this was way too slow. The design based on voltage division will give you a value (0 or 1) instantly: Simply read it from the pin.
The resistor for the photo resistor can be calculated from the photo sensor’s exposure to the light.
1) Define the threshold of light you are working in.
2) Measure the resistance of the light sensor when exposed to the threshold.
3) Choose a resistor with this very resistance for your photo resistor set up.
4) Now, an exposure of a larger amount of light than the threshold value outputs 0 and an exposure to a smaller amount of light outputs 1 to the pin.
Set it up like this:
— Development —
Day 1:
Idea Development
Day 2:
The input will be collected though an acceleration sensor (MX2125). The output will be carried out by an ordinary servo motor. The motor will open a valve build from Lego building blocks.
A picture of the motor connected to the Board of Education with the acceleration circuit:
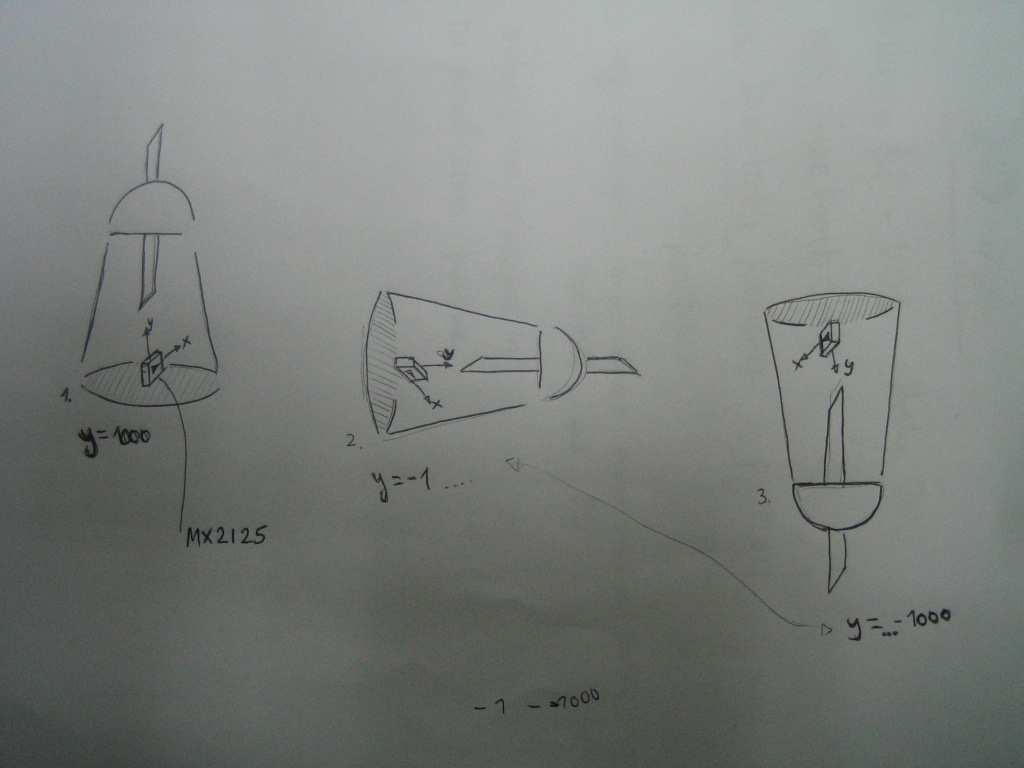
A sketch of the acceleration sensor’s placement into a hollow object:
Day3:
Piezo speaker + I Cube sensor tryout
The circuit:

The code:
The video: turn the speakers on and listen
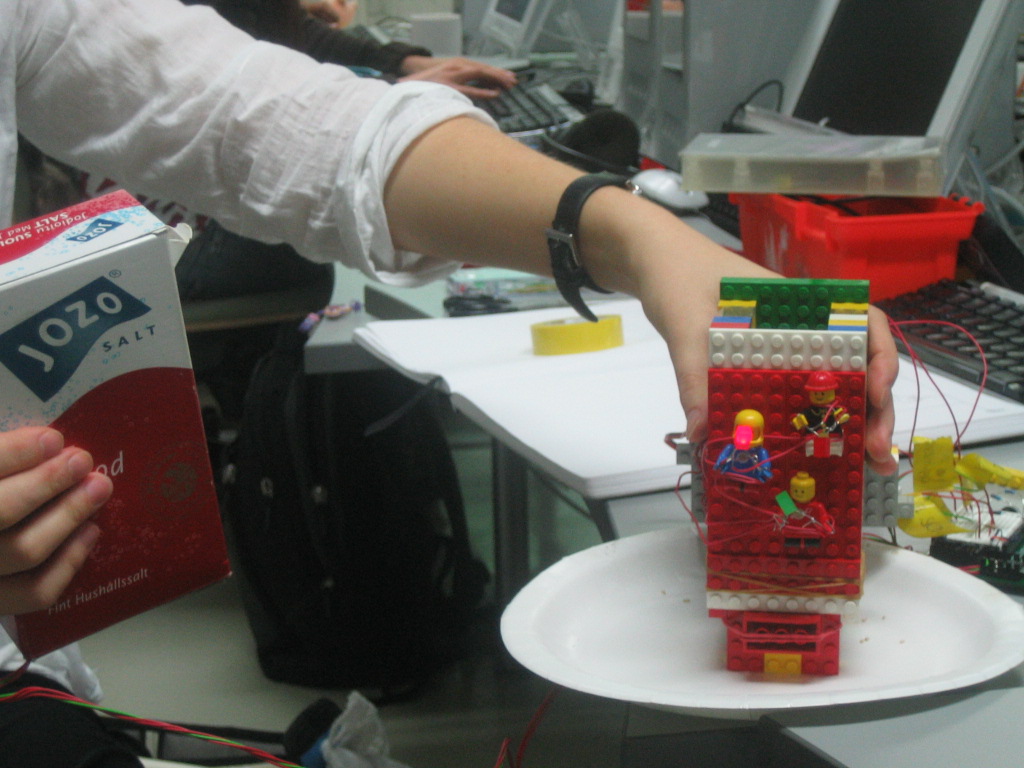
“gimme sugar” progress:
The Lego valve is opening and closing somehow when we are turning the Board of Education.
The valve is connected to the circuit on the assembling board:
We got a little bit stuck with the code for a while:

Here is the video: turn on the speakers to hear the valve opening and closing
Day 4:
“gimme sugar” progress:
The valve opens fully when the acceleration sensor is tilted at a sharp angle and it opens halfway when the sensor is tilted at a less sharp angle.
The valve opens for the time tilted, but not longer than 30 iterations of the code. The time passes faster when the tilted angle is sharper. Each time interval drops approximately 1TS of sugar. After the time ran out the sensor has to be brought back into the upright position for refilling.
During the test salt got stuck in the valve.
Soldering of the circuit components to a breadboard:
 ___
___
watch the video this time maybe without sound 😉
We decided to add a LED light sequence to the “sugar-pouring object” so that the person on the other end will receive feedback about the pouring state.
For this we had to introduce a second sensor to the project: Photo resistor!

Person holds the object: 1 LED shines
Person tilting the acceleration sensor: 3 LEDs sequence shines
The sharper the tilt the faster the light sequence
Once time ran out: 1 LED shines
An early version of the light sequence
Photo resistor and acceleration sensor on breadboard inside a salt box:
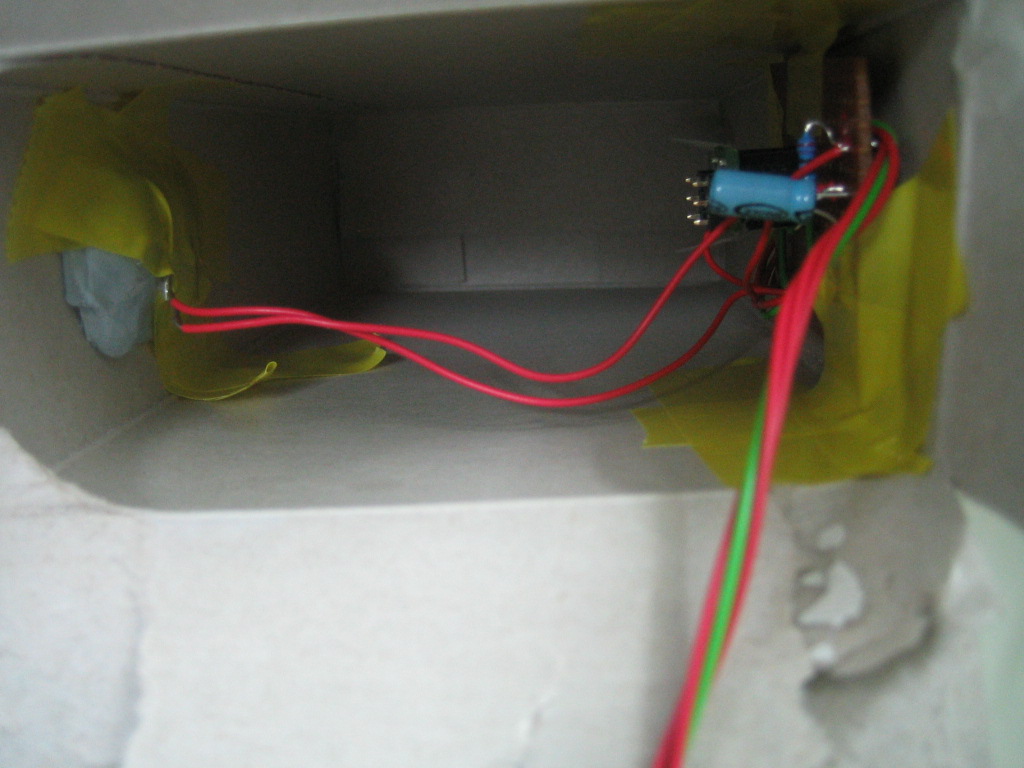
For prototyping purposes we stick to the salt box and imagine it is a sugar shaker!
Day 5:
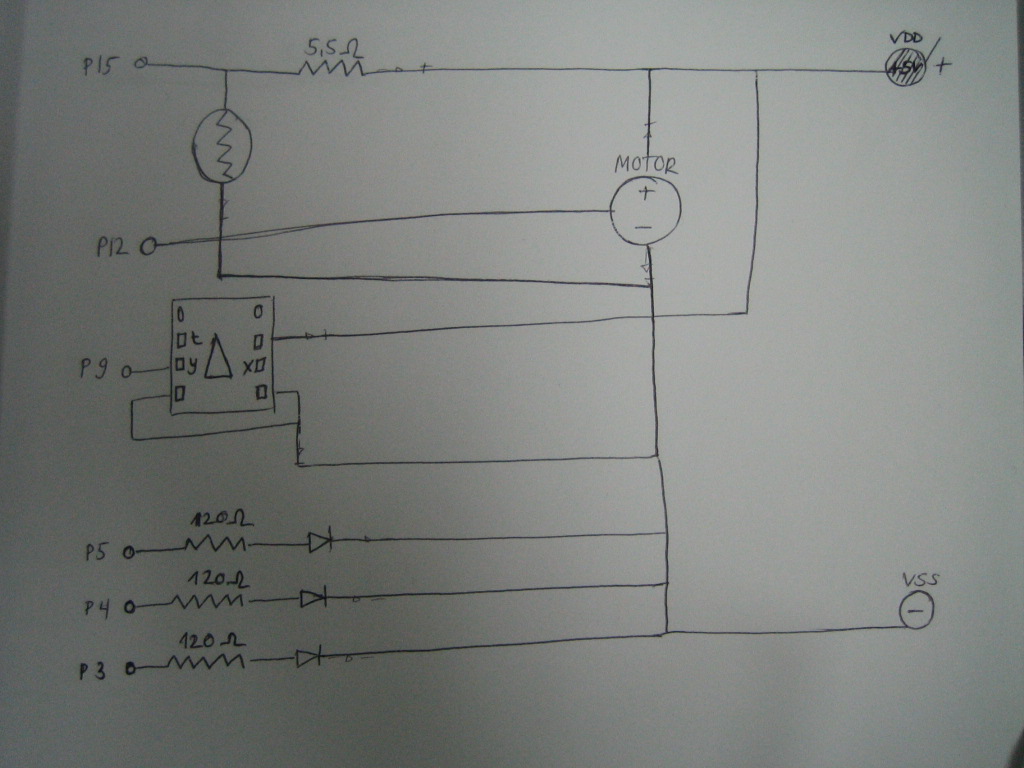
Version 1.0 of the code (Gimme Sugar v1.0.pdf) and the 1st physical prototype are ready!
Watch the video here:
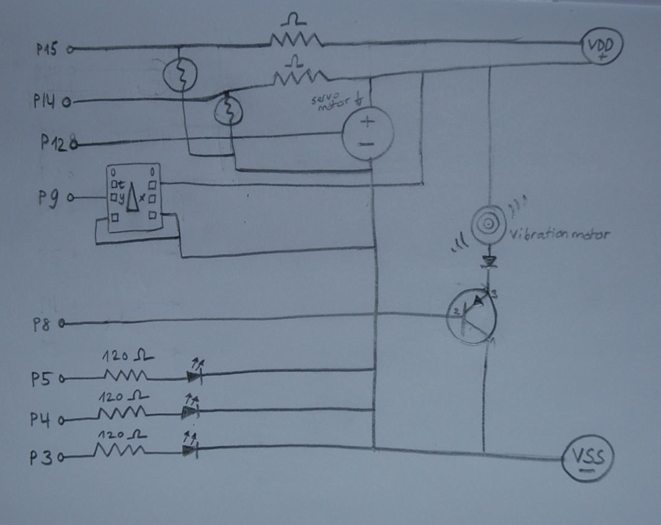
The schematic diagram of v1.0 for workshop:
(c) 2007, Jari Suominen and Anna Keune