This post describes how to program Atmega8 on Arduino board using AVR-GCC. The program enable user to control a LED by pressing a button.
Components
- Arduino x 1
- USB cable x 1
- LED x 1
- Button x 1
- Resistor (10KR) x 1

Read the rest of this entry »
Bit operations are used when interfacing with digital out such as switching pins On/Off. Programming with bit operations enable following functions to control digital out.
- Switching pins on (for example, turning on LED)
- Switching pins off (for example, turning off LED)
- Toggling pins (for example, Turning of LED if it is on and vice versa)
Read the rest of this entry »
Digital and analog pins are controlled by accessing bits. Arduino NG Diecimila has Atmel Atmega8 on board and Atmega8 has two digital ports and one analog (digital to analog converter) port. This post describes Pin assign between Arduion and Atmega8. It also describes location of bits assigned to specific ports.
Read the rest of this entry »
As Arduino has Atmel chip on board, you can also program code with C on your Mac. Softwares for the developing environment are all free. Programming with C looks more complicated but still all logic are the same as Arduion IDE and you can even create more functions with C. Once you have managesd to run your C language code on Arduio, you can also flash the code to other smaller or more powerful Atmel chips. This post describes how I as Mac user managed to write a code to blink LED on Arduion board.

Read the rest of this entry »
Concept
To make a simple and emotive communication device. the object consists of a dial that changes colour as the user rotates it. when tapped, the colour gets transformed into another remote device which slowly fades into the tapped colour.
What we made in the workshop
We were able to make a device prototype that had a dial which changed the brightness of the coloured light in the device. when tapped, the device sends the brightness information to another lamp(device) that changes its brightness accordingly.
Components used:
Basic stamp
accelerator sensor
Piezo vibration sensor
Digital to analog converter
RGB LEDs
*Group members: Takahisa Kobayashi, SunHwa Yu, Ramyah Gowrishankar
Reetta Nykänen, Michail Kouratoras and Lauri Kainulainen set out to create “something visual with audio”. With very different backgrounds everyone had something unique to offer to the end result which was “Mothman” or just “The Moth”; an interactive audio-visual day/night scene of a forest with a flying moth.
For the visualizations we used Processing (processing.org), for audio we chose Pure Data (puredata.info). Interaction with the piece happened through a Basic Stamp chip connected to an Ultrasonic sensor and an ambient light sensor. The former was for distance measuring (the closer you got the bigger the moth became) and the latter switched between day and night (when it was dark, it was night).
The chip was connected to Processing through a serial/USB-connection. It sent out a four byte variable where only the two first were used; one for distance value and the second for light amount. Processing made visuals based on these and sent out the first unmodified to Pure Data (both running on the same computer) through an OSC server (Open Sound Control). The light variable was converted into a simple binary value to indicate night or day. Based on these Pure Data chose which samples to play and modified them accordingly.
No screenshots here, but the youtube video on the student presentations says it all.
For graphics and code go here: http://lauri.sokkelo.net/files/moth.tar.gz. Sound not included due to huge size.
Updated on 7 November 2008
– Arduino x 20
– BASIC Stamp board (USB) x 6
– USB A-B mini cable x 9
– BASIC Stamp board (RS232) x 6
– RS232 to USB converter x 6
– Power adapter (9V) x 12
– Jumper wire box x 10
– Breadboard x 12
– Multimeter x 9
Our group (Juha, Henri and Andreas) created a basic shooting game using some sensors, flash and python. The sensors (compass and accelerator-sensors) controlled the movement of the aim, and a pressure sensor controller the shooting. The values from the sensors was sent to flash unsing xml-socket server built with python. The 3D interface was built using papervision 3D 2.0 beta.
Here is an online demo that works using the mouse for movement and the spacebar for shooting. Give the flash player focus by clicking anywhere inside the flash player window, otherwise the space bar won’t be recognized by the game.
The python code for this project will be published later.
http://mlab.taik.fi/~khamberg/game/
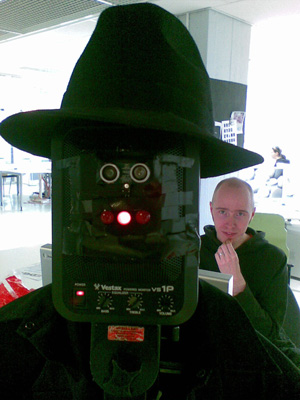
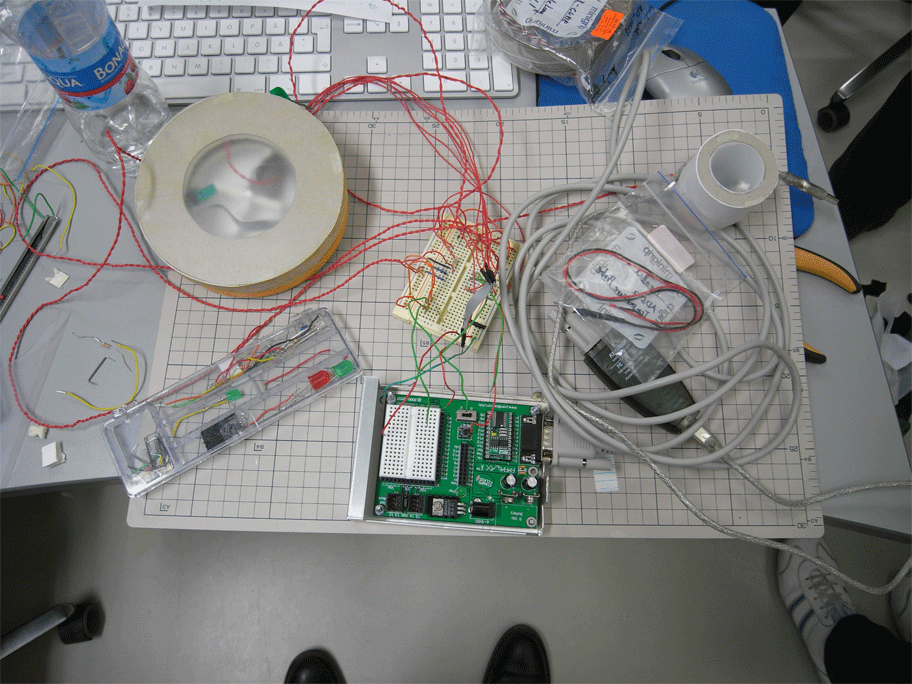
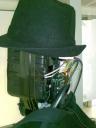
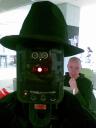
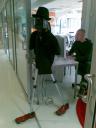
The doorman is a funny little interactive character, who welcomes every visitor to his domain, in this case Medialab. It is based on ultrasonic distance sensor, which detects the distance of the visitor and triggers a speech sample. At this stage, the sensor differentiates five distances, which all have their unique speech response. The doorman is trying to get visitors attention and asks him/her to approach and figure out what message he has.
The sensor is attached to a basic stamp, which sends midi note data through a modified midi cable to a midi interface. Each midi note triggers a different sample in the Kontakt sample player.
The mouth of the doorman is made with three LEDs. The LEDs blink from side to side while sound sample plays. The programming here was really awesome! 🙂
The icing on the cake is doorman’s convincing (detective style) clothes. They invite visitors to a very intimate contact!
Ilkka Olander & Teemu Korpilahti
DIARY DAY 1:
I will be on time today!!!
…hmmm…
interesting…liquid snow…?
Makes me wonder: What is right kind of interaction & how to trigger that in a human being? Milk wasted is totally wrong … It’s still maybe better used than half of the interactive art pieces that don’t even have a reasonable function to trigger in the first place!!
DAY 2:
Even heart functions like circuits/microprocessors/Helsinki Metro or analog devices…
SIMPLY: I / O
OR +/-
DAY 3:
In the pale light of the moon
I play the game of you.
Whoever I am
whoever you are.
(N. Gaiman, Sandman)
Metaphors:
Moon, solar eclipse > Nosferatu, Noctuide, Nocturne… Underconsciousness
Sun > Butterfly, Day…
Outcome of the workshop:
Provocate your creative underconsciousness: Call the powers, call The Great Rabbit-Moth-Synth-Man!
He is so tame he will sit on your face and flap!
Sound object that interact with the voice.
The aim is to create a metaphor of the digitalization of the sound, continue signal to discontinue signal, and to try to make a machine, which react with the voice’s expressivity.
Diagram:
input sound -> microphone -> audio interface -> computer (max/msp) -> arduino board -> motors -> output sound
Sound: the principally incoming sound is the voice.
Microphone: cardioid headband voice microphone.
Audio interface: it transforms the analog signal in digital information.
Computer (max/msp): It analyzes the information (pitch and amplitude) that comes from the interface with help of the fiddle object (Max/msp). For control and to communicate with the arduino, I use the arduino object.
Arduino board: the information that the analysis gives me, modify the number of motors that are active and the velocity of each one.
Sound object: is a small machine that consists in twelfth motors that are controlled by the input sound (voice). Each motor produces a pulse and repetitive output sound. Three of them have the possibility to control their velocity and others to control only on/off.
Sound: the pulse and repetitive sound is created by each motor with a propeller touching a fix material in each rotation.
Alejandro Montes de Oca
If you have following issue on your physical computing. Miditro Wireless might be a solution.
- PureData or Max/MSP user
- Familiar with MIDI interface
- Control sensors wirelessly even though most of computation is done with PD or Max/MSP
http://eroktronix.com/
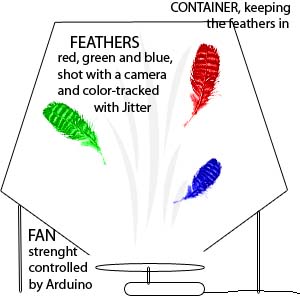 My new project plan goes as follows. I have a fan blowing air into a transparent container with feather of different color (say, red, green and blue). The movement of these feathers is then shot with a video camera or a webcam and color-tracked with Jitter. The data of the X-Y movement of each feather is then mapped to drive sound (2 control parameters per feather = 6 in total). To make it more interesting, the fan should be controlled by Arduino as well. I could drive the fan with a semi-random algorithmic data to make the whole thing a self-containing alive entity or, say, control it with a midi controller for a sound performance. Or the fan could be indirectly controlled by the feathers movement to introduce some feedback to the system. Furthermore, I could make the system more interesting by having several fans to create different turbulent fields.So, how easy is it to control a fan with Arduino? Would the small motors we have be powerful enough to operate as a fan (if I build a fan blade for example from cardboard) or should I buy ready fans?The color tracking works already, I’ve tested it. I should just 1.) obtain a fan 2.) obtain feathers 3.) obtain materials to build a container for the feathers and build it, 3.) figure out how to control the fan with Arduino and 4.) build a sound-making instrument and map the paramaeters in a musical way.Comments, suggestions?